Follow My Blog

Follow on Bloglovin

12.19.2015

Make A Wish

I designed this card using the sketch from Freshly Made Sketches, and colour scheme from Sunday Stamps (although, I'm too late to enter the challenge there). My card uses many new products from the upcoming Occasion Catalogue (live January 5th). Check it out:


I embossed my white layer with the new Confetti TIEF before stamping with a new birthday set called Party Wishes. It coordinates with an entire suite of stuff, including punches, DSP, twine & more!


To finish off the card, I rounded the top corners with the Curvy Corner Trio Punch, a returning favourite from the Holiday Catalogue, and wrapped some baker's twine around the front (also new!). On the inside, I stamped a sentiment from the same birthday set.


Until next time, stay crafty!
Steph

Entering this card at Freshly Made Sketches, #217

12.17.2015

Love Your Face

It's been a while! You know how busy this time of year gets... then throw in a bad cold for two weeks, a kid with the flu for another week, the other kid with a cold the next week (which then turned into strep) and then back to the first kid again who got some sort of virus. That pretty much ate up all of December... 

Anyway, I wanted to focus on something other than Christmas and spotted my unused Larger Than Life stamp set on the shelf and a sketch over at Freshly Made Sketches and I got to work.


To be honest, I felt REALLY rusty! It's been about a month since I've really created anything, but this card is growing on me. I stamped the letters in four different colours - Melon Mambo, Brushing Bride, Watermelon Wonder & Cherry Cobbler - and then I fussy cut them.

I couldn't really decide on what sentiment to put in the banner (I literally stared at all of the possibilities for over 10 minutes!) and then "your face" popped into my head and I had a chuckle. ;)

Until next time, stay crafty!
Steph


Entering at Freshly Made Sketches, #217

11.03.2015

Team Challenge

We were given a team challenge recently to use random pieces together on a card. I love challenges like that! What's better, is that it fits in over at The Friday Mashup too. :)

These were the pieces we were given:

    *1 Leaf
    *1 Doily
    *3 Banners

We were allowed to use other current papers, colours and stamps, just as long as we included all of the pieces we were given.


Here's the card I created:


I'm really happy with how the card turned out. I kept the colour pallet pretty neutral as I wanted the banners to be my pop of colour. I also didn't want to use a lot of other products or special techniques because I wanted to show that they're not always necessary.

Do you notice two leaves on my card? Well, did you know that if you distress Stampin' Up! card stock, it becomes very pliable and you can pull the layers apart? Cool, eh?! This technique is both simple and eye-catching. It gives some texture too!


To add a little interest, I used the Wetlands stamp set. Love it because it offers both images and sentiments.

Hope you love my card... and challenge yourself too with something similar (scraps on your desk, perhaps?!) or enter an online challenge. They're lots of fun!

Until next time, stay crafty!
Steph

I'm entering The Friday Mashup Challenge #232, I opted for a project with leaves.


10.31.2015

Glow Stick Broom Sticks

Happy Halloween! Today I'm sharing the "treat" my daughter and I made for all her classmates. I got the idea from Alex over at Northstory. I opted for kraft packing paper (I had lots from previous packages, so it was both plentiful and FREE!).

Here's what you'll need:
Glow Sticks from your local dollar store
Kraft Packing Packing
Fringe Scissors
Glue Dots
Tags
Twine


I didn't really pay too much attention to the length of my strips of paper, but I did cut them all to roughly 2" and I'll guess 10" in length. I used two strips per broom and 3 glue dots - one to start, one to hold the two strips together and one to finish.


When those were done, I added the bracelet attachment to the top and tied a tag to it (there were some grooves in the attachment to keep the tag from slipping down). The tag was created using pieces from past Paper Pumpkin kits (don't you love that stamp set?!) and Black Baker's Twine. My daughter then signed her name on all of them and then went back later and drew little pictures. So cute!


Here are all of them completed (including the one on the end that was accidentally cracked). They were well liked and the teachers were raving about them!


This one was my favourite tag - my daughter drew a bunch of doors for "trick-or-treating". Love!

Until next time, stay crafty! (and Happy Haunting!)
Steph

10.30.2015

Halloween Notecards

Today I'm sharing with you a few Halloween cards I created for the lovely and talented Samantha at Creations by Samantha. She's been carrying a select number of my greeting cards in her flower shop in Toronto for about a year. Check them out:


To create these cards, I used some (retired) Halloween DSP - I just couldn't resist the cute characters. With that, I created some tags and images using pieces from past Paper Pumpkin kits, including some of the awesome stamps you get with the kits every month!

The note cards and envelopes are the perfect pairing with Samantha's beautiful floral arrangements. If you're in the Toronto area, I highly recommend her shop. You will not be disappointed!

Until next time, stay crafty!
Steph

10.26.2015

Catalogue CASE

I love the Stampin' Up! Catalogues! So many pretty things to look at and great inspiration too. Sometimes I love something so much, I've just gotta CASE it. This card is from the Home for Christmas product suite. I CASEd the card down in the front, with a few modifications.


I kept my card a standard A2, thus being able to make a larger tag. I liked seeing more of the scalloped top, so I moved my bow down further and left room for some Cherry Cobbler Thick Baker's Twine. I coloured the stamp from the Cozy Christmas stamp set using Stampin' Write Markers.


Before gluing my DSP down, I stamped one of the images from Gorgeous Grunge - love that set for quick & easy texture. I popped the tag up with Dimensionals and then fringed the ends of my baker's twine.


To finish things off, I added a few Enamel Dots from the same suite and stamped a little more grunge on the inside. This is one of three cards we'll be making in tomorrow's class. :)

Until next time, stay crafty!
Steph

10.21.2015

Joy to the World

Happy Wednesday! Today I'm showing you a quick & easy card. It uses the Peaceful Wreath stamp set and Wonderful Wreath Framelits Die. Check it out:


I started by stamping the branch image in Mossy Meadow ink on Very Vanilla Card Stock and then coloured the images in with Pear Pizzazz and Cherry Cobbler Stampin' Write Markers. I layered that on some (retired) gold paper. I stamped "to the world" in Mossy Meadow also and then punched using the Banner Punch. It layered perfectly behind the tail of my "joy" die cut that I cut from Gold Glimmer Paper.


On the inside, I stamped the branch once more and coloured it in. Quick and simple, right?!

If you love this stamp set, now's the time to get it! Stampin' Up! is offering 15% off all regular priced stamps from October 19-23, 2015! You can order through my online store using hostess code: GZUK9DRQ

This will also be available in my Christmas Class offerings. You can see the full line-up here.

Until next time, stay crafty!
Steph

10.16.2015

Flurry of Wishes

Hello and happy Friday! Today I'm showing you one of the cards I'm offering in one of my classes in November. Actually, you may have seen it in the Holiday Catalogue - I CASEd it. ;)


This card is quick and easy thanks to the Flurry of Wishes Bundle. I started with a Pool Party base and stamped the largest snowflake in Lost Lagoon. Next, on a piece of vellum, I heat embossed the remaining snowflakes in white. The two smaller ones are punched with the Snow Flurry Punch and the larger one coordinates with the Flower Medallion Punch.


To adhere my vellum, I used the Fine Tip Glue Pen - love it! To finish off the front, I added a few jewels and a sentiment from the same set that I heat embossed and punched with the Washi Label Punch. I kept the inside simple by just stamping the large snowflake.

Until next time, stay crafty!
Steph

10.14.2015

Punched Snowman

Happy Wednesday! Sorry I missed ya on Monday, I was busy eating turkey and celebrating with my family (Canadian Thanksgiving). Today I've got another quickie project for you. One you can easily make during your busy week. Check it out:


The snowman was created with circle punches and the hat was made with a square punch. Quick and easy! You could leave the snowman as is, but I opted for a little stamping, using the Holly Jolly Greetings set. I really love this set because it's a nice mix of images and text. I also used "jolly" and "peace" from the same set to create a couple of banners. The "Merry Christmas" is from the stamp set Petite Pairs.

I adhered my snowman on some Home for Christmas DSP and then mounted that on some Silver Foil and Basic Black mats. Before adhering that down, I ran my card layer through the Big Shot using the Softly Falling TIEF. This one gives such lovely texture!


On the inside, I added a few more tiny snowflakes and punched stars... and a little room for writing. ;)

Until next time, stay crafty!
Steph

10.07.2015

Crumb Cake & Gold

Happy "hump day"! Hope you're having a great week so far. Today's post is a quickie... a card you can make in under 10 minutes.


For this card, I used one stamp set - Flurry of Wishes - as it has both images and sentiments. Love that! I started with a Crumb Cake base, stamping my snowflake image in the same colour. On a scrap of Very Vanilla, I heat embossed the double snowflake image twice and one of the sentiments in gold. The snowflakes were punched using the coordinating punch and the sentiment was cut using the Circle Framelits and then matted on some Gold Foil with the 1-3/4" Circle Punch. Before popping up my sentiment, I added a couple strips of Washi Tape.


On the inside, I kept the same feel with the stamped snowflake & Washi and then popped up that last snowflake. This will be one of three designs we'll be making at one of my upcoming classes. ;)

Until next time, stay crafty!
Steph

10.05.2015

Littly Pony Punch Art

I've been gravitating toward "punch art" lately, partly because I need to make cards with images I don't have, but also because it's lots of fun! My daughter was invited to a birthday party this past weekend and the birthday girl loves My Little Pony. I went to Pinterest and was inspired by Kelly Kent's card of a horse.


I kept the punch art elements very similar to Kelly's, but of course I had to change the colours and add some eyelashes to better represent My Little Pony.

I used the XL Oval Punch, Large Oval Punch, Owl Builder Punch and Bird Builder Punch to build my pony. To give the eyes more life, I used the White Gel Pen. I wanted to add a little interest, so I used the Star Framelits for the pony to pop through.


For a special added touch, I used the Little Letters Thinlits (love those!!) to personalize the card and then some glitter - what girl doesn't like some sparkle?!


Until next time, stay crafty!
Steph

10.02.2015

Revamping

Happy Friday!! Are you excited for the weekend? I plan to be in my studio working away, preparing for my upcoming classes and shows! I wrote a while back about how I came across a bin full of last years card kits and other goodies and this was one kit I revamped for this years' selection. The DSP is now retired, but it works well with some of this years' Holiday Catalogue product. Plus, you can easily adapt the layout for any paper or product. Check it out...


All the images are from the awesome Flurry of Wishes stamp set. It coordinates beautifully with two punches, one of which can be bundled to save yourself an extra 15%!

I started by stamping a snowflake in a similar colour tone on my card base and then layered by two DSP pieces (3" x 4", I believe) on top. Before doing that though, I punched all the corners with the Curvy Corner Trio Punch - so versatile!


It's hard to tell in the photo, but there are four snowflakes that are both heat embossed and punched using the snowflake punch. The best part about this is that the two snowflakes line up perfectly for the double-snowflake punch!

The sentiment is from the same set and punched out with the Note Tag Punch and then accented with a bow and tiny wooden snowflake.

Until next time, stay crafty!
Steph

9.30.2015

Shaker Card Magic!

Are you one to think making shaker cards is hard or you need a bunch of special things to make them? Well, you're wrong! I learned at an event I attended in the summer that you actually don't need much at all... and I'm here to share the secret with you!

All you need are the edges from your Dimensionals (pop dots) and some Window Sheets. Want to reuse/recycle and save some more money?? Use the extra acetate sheet Stampin' Up! gives you when you buy Photopolymer stamps. ;)


Start by cutting slits along the side of your Dimensional edges. Make sure not to cut all the way through. This will help to make them easy to bend around your window.


After you've punched or die cut your opening, glue the window sheet down and then start sticking your cut Dimensional border around. It doesn't have to be perfectly around your shape, but you want to make sure your shaker pieces can't escape.


Before you affix it to your card base, lay your confetti pieces down and put a few more Dimensionals on the card layer so everything is raised, not just the area around your cut out.


Sometimes the confetti pieces get stuck, so just give your card a few good shakes and all should be good, but just like that, your card is done! Isn't it easy?!


Give it a try with various punches or Framelits/Dies and see all the fun things you can come up with.

Until next time, stay crafty!
Steph

9.29.2015

Just Married Punch Art

Over the weekend I was looking for some inspiration and I turned to my sketchbook. In it, I found a quick sketch I did of something similar below, likely, the idea originated from a card I received (or saw in a store). I thought it was perfect for some punch art!


The punch art was simple:

Circle Punches - 1/2", 1" and 2-1/2"
3/4" Square Punch
Bow Builder Punch
Balloon Framelits (the tiny bow)


Once I had all the pieces glued, I added a tiny jewel to the bow for a little bling. The sentiment was easily done with the Alphabet Rotary Stamp. I love that the rotary includes a little heart! I really wanted to just glue my little punch art car on the card base, but wasn't quite satisfied with it. Adding the Silver Metallic Thread gave it that extra umph. 


On the inside, I added a few punched flowers with some more bling in the centre.

Until next time, stay crafty!
Steph


9.24.2015

Minecraft Reveal

The other day I posted the "how to" on making this Minecraft card that was inspired by Stamping T and today I'm posting the final card. I really love the way it turned out!


I wrote in my last post that I wasn't quite sure how I was going to finish the card off... well, I decided to keep the remainder of the grid exposed at the bottom and stamp the sentiment in StazOn (the stamp set is long retired). I then mounted my grid piece on some Basic Black and then on a Tempting Turquoise card base. I wrapped some Basic Black Baker's Twine around to finish off the look.


I kept the inside super simple, just adding a few tiny 1/4" squares for some interest and texture.


Here's a closer look at some of the details. Like I said in the last post, I really love how it turned out and the effect created with the squares, but I don't think I'll make another with such tiny ones again. ;)

Until next time, stay crafty!
Steph

9.22.2015

Minecraft Custom Request

I wrote a post last week about a custom request and here's another one that challenged me! I was asked to create a Minecraft card for a customer and I really had no clue as to what this was, but that wasn't going to stop me from creating something. I turned to Pinterest, of course and was inspired by Stamping T in Australia. Here is a step-by-step on how I put this (tedious) card together.

I started out by raiding my scrap bin and pulling out different shades of green, plus black and then cut them into 1/4" strips and then 1/4" squares. My Stampin' Trimmer was my best friend for this project!


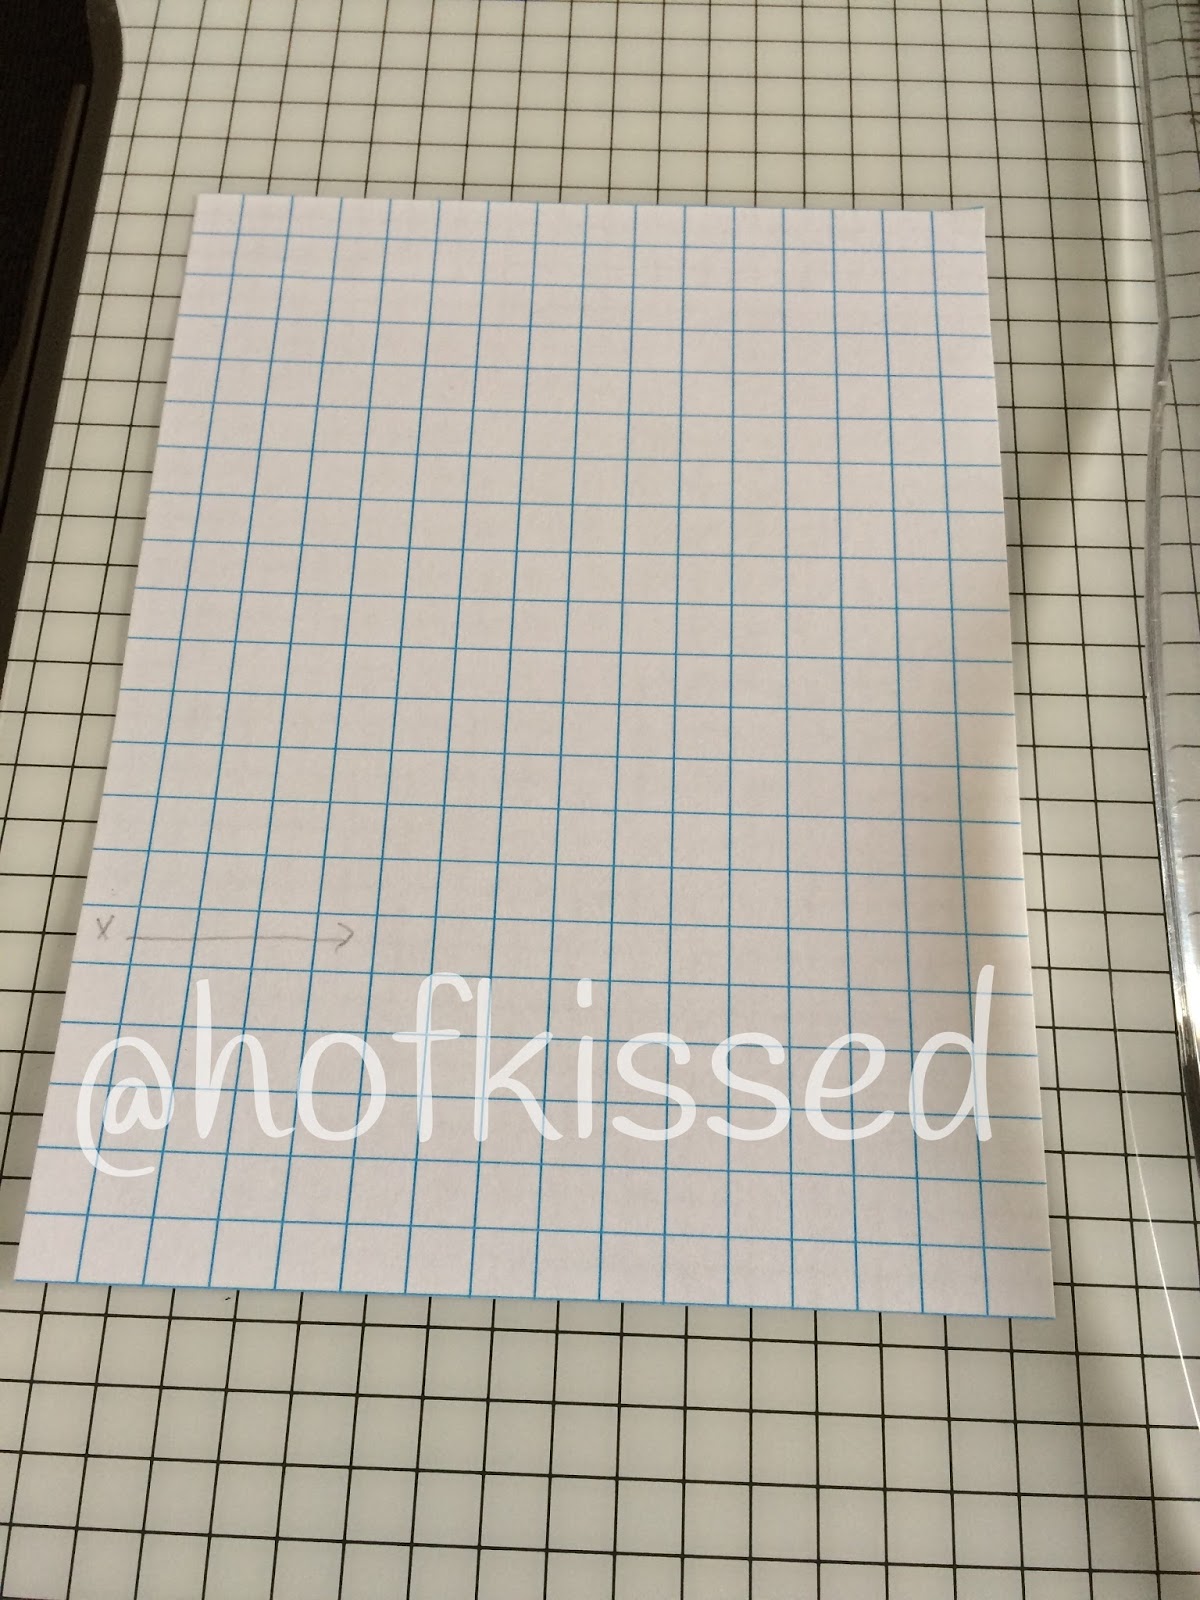
I happened to have some sticky note pages that looked like grid paper, so I trimmed that down so it would fit on my card front (4" x 5-1/4"). You could use any grid paper, but I found it convenient that my page stayed in place as I was gluing all the little pieces on.


Next I marked out where I wanted certain things to go. I knew I wanted the image to be square, but wasn't entirely sure what I was going to put at the bottom yet.


This AMAZING Fine Tip Glue Pen (in the Holiday Catalogue) made this project more manageable.


After gluing down the black areas, I just randomly started gluing the remaining green squares. I started with just one shade of green and then moved on to the next.


I really loved seeing all the different shades together and I might do another project like it, but with bigger squares! ;) This was VERY time consuming...


Towards the end, I wasn't as concerned about having the same shades close together. It still looked good. I think from start to finish, this card took me around 2-1/2 hours! It's really crazy when you think about it, but it was worth it when my customer was thrilled with the result. I think they also thought I was a little crazy!


Come back tomorrow to see the final result!

Until then, stay crafty!
Steph