Follow My Blog

Follow on Bloglovin
Showing posts with label Punch: Scallop Circle. Show all posts

4.11.2014

A Little (Blue) Bird Told Me...

A couple of years ago I did some humorous cards relating to a popular social networking site. Now I've come up with a couple more relating to another popular #socialnetworking site.
I'm sure you can guess which site I'm referring too here. I'm always trying to push card sales, not just because I make them, but also because I know how happy people are when they receive a card. Even better, a card in the mail. And even better than that, a handcrafted one!

I personally don't think wishing someone a happy birthday through social media is acceptable, but perhaps I'm "old school". hehe This card is the best of both worlds - fitting in with the social networking crowd, and giving cards. :)

Until next time, stay crafty!
Steph

RECIPE:
Paper: Daffodil Delight, Tempting Turquoise, Whisper White
Punches: 2-3/8" Scallop Circle, 2" Scallop Circle (non SU!), 1-3/4" Circle, Bird Builder
Accessories: Jewel Rhinestones, MDS Software

4.08.2014

Sunday Stamps SSC73

We've got a sweet colour combo over at Sunday Stamps for the next two weeks - Tempting Turquoise, Pink Pirouette & Smokey Slate.
I typically would never combine pink and blue on a baby card, but I just love the way this turned out! I've been in a "use what I have" kick lately. I cut the sentiment on my e-cutter YEARS AGO (now you know I save everything!) and when I came across these cutouts, I knew I had to use them. Next, I chose a stamp set I never used a lot when it was current, but there must be a reason I keep it around, right? So I used it! I didn't want to use a lot of other products, so I accented with punches and scattered some jewels.

Hope you'll get a chance to play along with us. We always love seeing what people create. Don't forget to check out the other Design Team members for inspiration... and leave them some love too!

Until next time, stay crafty!
Steph

RECIPE:
Paper: Whisper White, Tempting Turquoise
Ink: Smokey Slate
Stamps: Baby Boutique (retired), Cuddles & Kisses
Tools: Postage Punch, Decorative Label Punch, Scallop Circle Punch
Accessories: Jewel Rhinestones
Challenge: Sunday Stamps

1.26.2014

Sunday Stamps Sketch!

Welcome to another bi-weekly challenge at Sunday Stamps! This time around, Kathya's got a fabulous sketch for us. I really enjoyed working with it.


I stuck really close to the sketch and got the inspiration for the colours from the banner I created using the Watercolouring with Tissue Paper Technique. You can see the technique here. With Valentine's Day around the corner, I thought I'd keep in line with the heart from the sketch. I punched the hearts from a scrap of paper using the retired SU! punch, Heart to Heart and then punched that out with the 2-1/2" Scallop Circle. I popped it up with Dimensionals, same with my sentiment. For some subtle bling, I scattered some jewels.

Hope you'll join us. You have until February 8th to play along. Check out the other lovely DT Member Blogs for more inspiration. :)

Until next time, stay crafty!
Steph

RECIPE:
Paper: Wisteria Wonder, Whisper White, Calypso Coral
Ink: Calypso Coral
Stamps: Teeny Tiny Wishes
Tools: Heart to Heart Punch (retired), 2-1/2" Scallop Circle, Modern Label Punch, Word Window Punch
Accessories: Jewels
Challenge: Sunday Stamps


10.09.2013

Birthday Cake

Today's post is later than I had hoped, but I hope it was worth the wait! ;)


I created this card a few weeks ago for a dear friends' birthday. It was perfect because this card requires hand-delivery and we were going out for tea, so she had this card displayed on the table the entire time for her birthday celebration. Isn't the cake tea light adorable?! I found it on Pinterest (of course!) and you can find the awesome tutorial here on Jill George's Blog.

I didn't follow it exactly. I didn't bother with the separate template for the "icing". I just found the middle on the back, punched a hole and then cut slits that were long enough so that my flame could slide through.

On the back of the card, I punched a hole with the labels punch pack so that the switch could be turned on and off. My friend love it and I think I'll be making a bunch of mini cakes now. :)

Until next time, stay crafty!
Steph

RECIPE
Paper: Regal Rose, Pretty in Pink, Whisper White, SAB DSP
Ink:
Perfect Plum
Stamps: Simply Sketched
Tools: Punch Pack, 1-3/4" & 2-3/8" Scallop Circle Punches, Labels Punch Pack
Accessories: Jewels, Stitched Grosgrain Ribbon

6.05.2013

Doily Thanks

This card was one I designed for Sunday Stamps several weeks ago, but never got around to blogging about it. :( My life lately has been insanely busy!

My design was partially inspired by a card seen on Pinterest - a large background stamp was used and cut into quarters (or I assume so anyway since that's what I did). The card on Pinterest was quite simple... I jazzed it up by stamping the fuller image again and then adding a sentiment. Check it out:


Paper: Lucky Limeade, Whisper White, Daffodil Delight
Ink: Rich Razzleberry, Lucky Limeade
Stamps: Hello, Doily, A Round Array
Tools: Big Shot, Perfect Polk Dots TIEF, Punches: 7/8" Scallop, 1" Circle, Artisan Label
I'm really happy with the way this card turned out. I created an abstract layout that I felt fit with the way I stamped my image. I kept this card fairly simple... no bling! But I did add lots of dimension with some embossing and popping up my sentiment in two spots.

Hope you like my design... this is a great one if you have to whip up a lot of thank you cards!

Until next time, stay crafty!
Steph

5.01.2013

Butterfly 3x3 Gift Set

Today I'm sharing a project I originally designed to use up retiring DSP... but I loved it so much I created an entire line to sell in my online store. Check it out:


Now, this DSP (Lovely Flowers) I've been hanging onto for a long while! It's so pretty, but it was finally time to let it go. :) It was just perfect for these butterfly cards...

I got the basic idea for the holder based on the "Tea Bag Pocket" tutorials I've seen online. I customized it to be able to fit my 3x3 cards & envelopes. The cards fit on one side and the envelopes on the other.

This is a sweet set to give to a host/hostess for all those summer BBQs you may be attending, for a thank you, teacher gift and of course, occasions such as Mother's Day (which is on May 12th).

BUY NOW! You can purchase this here in my online store!

Until next time, stay crafty!
Steph

P.S. If you live in or around Cambridge, we'll be making a version of this set on Sunday, May 5th in my "Fabulously Feminine" class. There are still a couple of spaces if you want to join the fun. The cost is only $10!

4.12.2013

Magnetic Bookmarks

Last year I posted some magnetic bookmarks I made (you can view that post here)... I received some feedback that I needed some gender neutral and masculine ones also. So here they are:


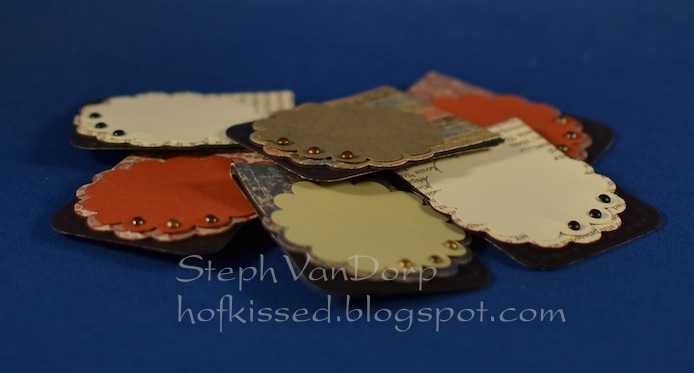
To make these, you need the Two Tags Bigz Die and the 1-3/4" Scallop Circle Punch... if you want to add that extra layer. You also need some magnets. I used full magnet sheets, so my entire bookmark is backed in magnet, but you can opt to do a smaller magnet also. You can then decorate as desired, but don't make it too bulky or else your book won't close.

Until next time, stay crafty!
Steph

4.07.2013

Spring Colours for Sunday Stamps

Well, the sun is shinning here, for the moment, but it certainly doesn't feel like Spring out there! I'm hosting the challenge this week at Sunday Stamps and chose some spring-like colours for this week's colour challenge.

Paper: Not Quite Navy, Wild Wasabi, Whisper White
Ink: So Saffron, Wild Wasabi, Not Quite Navy
Stamps: Best of Flowers, Bitty Banners
Tools: Big Shot, Honeycomb TIEF, Scallop Border & 1-1/4" Circle Punch
Accessories: So Saffron Ribbon (retired)
I was excited to ink up my Best of Flowers stamp set for the first time... I just love the images. The size of the images are smaller than the originals, but for a card maker, they're perfect. Plus, the new image coordinates with the 1-1/4" Scallop Circle Punch! Who doesn't love a stamp & punch combo?!

If you need some more inspiration, check out what the rest of the design team has created for you and then post your project so that we too can get inspired!


Until next time, stay crafty!
Steph

3.19.2013

Fancy Wedding

Sometimes I create cards that are truly unique and "one of a kind" because for one reason or another, I wouldn't be able to create an exact replica. Today's card is an example of that (and you'll see why below)... Check it out:


Paper: Very Vanilla
Ink: Soft Suede, Baja Breeze
Stamps: Sweet Essentials, One in a Million
Tools: Big Shot, Fancy Fan TIEF, Decorative Label Punch
Accessories: Pleated Ribbon (retired), Antique Brad

The beauty of this card is that the flower is created from some tulle I saved from another wedding (that had mints in it). I reused the piece of tulle by punching out some scallops and folding them in fourths to create my flower. I then simply added some pleated ribbon and the sentiment and the card was complete.

This card will never be created again because I do not have the tulle anymore and although I managed to punch some scallops from the tulle, it was a real pain & wasted a lot of it trying to get good punches. I love how this card turned out, but it's not worth it to try and recreate it. :)

Until next time, stay crafty!
Steph

2.22.2013

Tiny Dresses for Tiny Babies

As I posted the other day, I've got babies on the brain. :) As promised, here is the little girl version of the card from a couple of days ago:

Paper: Blushing Bride, Crumb Cake, Whisper White, Twitterpated
Ink: Blushing Bride, Early Espresso
Stamps: Ciao, Baby; Cuddles & Kisses
Tools: Big Shot, Perfect Polka Dots TIEF, Punches: Postage, Owl Builder &
7/8" Scallop Circle
Accessories: Pleated Ribbon (retired)
Aren't these dresses precious?! So easy to make thanks to the Owl Punch and some Pleated Ribbon (that's retired unfortunately). I kept the same layout as the boy card and just love how this card turned out.

What do you think?

Until next time, stay crafty!
Steph

2.20.2013

Here Comes Baby

I've got babies on the brain... after all, I'm due with my second in just a couple of weeks! Here's a card I recently created:

Paper: Crumb Cake, Pear Pizzazz (retired), Nursery Nest DSP (retired),
Whisper White
Ink: Basic Gray, Early Espresso
Stamps: Ciao, Baby, Cuddles & Kisses
Tools: Big Shot, Perfect Polka Dots TIEF, Postage Punch,
Owl Punch, 7/8" Scallop Circle
Accessories: Pearls
The idea to use the Owl Punch to create these adorable tiny overalls isn't mine... there are many samples floating around the WWW. I just couldn't resist creating some! I used some of the smallest pearls to create little "buttons" on each pair of overalls and the new Ciao, Baby stamp set with the coordinating 7/8" Scallop Circle Punch to create a nice cluster of images as a focal point.

The Perfect Polka Dots TIEF is just the perfect thing to use for baby cards... and when you have embossing, I find not much else is needed. Inside, I used one of the beautiful sentiments from the new Cuddles & Kisses stamp set - "A new little someone to kiss and to love, a happy addition from heaven above".

I created a baby girl version of this card that I'll share with you in another post. :) Stay tuned!

Until next time, stay crafty!
Steph

2.17.2013

It's Sketch Time at Sunday Stamps!

Haley has a great sketch over at Sunday Stamps this week! She reminds us of something too - that our sketches are just a guideline to aid in your creativity! You don't need to necessarily add every element from our sketches, but as long as you stick to the general idea of them, we're happy. :)

Paper: Crumb Cake, Marina Mist, Early Espresso, Elegant Soiree DSP (retired)
Ink: Marina Mist
Stamp: Just for You (exclusive with Pop Up Posies Kit)
Tools: Big Shot, Fancy Fan TIEF, Punches: Scallop Trim Border,
Scallop Trim Corner, Scallop Circle
Accessories: Flower Trim, Vintage Faceted Buttons, Pop Up Posies Kit
This card came together fairly quickly thanks to the Pop Up Posies Kit in the Spring Catalogue! I didn't use any of the flower pieces, but I did use the embossed label and buttons. The flower I made using my Scallop Circle Punch (4 punches), folded them in quarters and then added a single flower from the new Flower Trim found in the Spring Catalogue also.

I hope you'll play along with us this week. Make sure you head on over to Sunday Stamps and check out what the rest of the Design Team has created for inspiration!


Until next time, stay crafty!
Steph

2.08.2013

Hearts of Love

Whether for Valentine's Day, anniversary or perhaps a wedding, this card works. I didn't make it specific for any of the mentioned occasions, but the sentiment just speaks love...


Paper: Naturals White, Beau Chateau DSP (retired), More Amore
Ink: Soft Suede
Stamps: One in a Million
Tools: 2-3/8" Scallop Circle Punch, Lacy Brocade TIEF
Accessories: Dazzling Details, 5/8" Flower Trim, tiny brad

I just love the new Flower Trim in the Spring Catty! It's so versatile... especially when you cut it up like I did to make single flowers. :) I created my paper flower from a scallop punch, if you can believe that! I punched 4 scallops, crumpled them and then folded in quarters. I punched tiny holes at the point and held the entire thing together with a tiny brad.

I cut apart some of the hearts from the laser cut sheets in the More Amore Specialty DSP. I stamped the sentiment on one of them and adhered them to my embossed & sponged layer. I thought it needed a little more "bling" when it was all put together, so I used some dazzling details along parts of the embossing. I think this card has a vintage feel to it...

What do you think?

Until next time, stay crafty!
Steph

2.03.2013

Let's Get Sketchy... Over at Sunday Stamps!

Welcome to another Sunday! Is the weekend almost over already?! Time is just going too fast around here... however, I do always love ending my weekend with Sunday Stamps! Holly's got a fun, simple sketch this week.

Paper: Sahara Sand, Very Vanilla, First Edition DSP
Ink: Riding Hood Red, Pretty in Pink
Stamps: Elements of Style
Tools: Big Shot, Lacy Brocade TIEF, Scallop Circle Punches, 2-1/2 Circle Punch
Accessories: Pearls, Shimmer Spritz
I liked the simplicity of the sketch and when I saw the flower, I thought about punching that space with my 2-1/2" Circle Punch. I used my Stamp-A-Ma-Jig to stamp the floral image from Elements of Style so that it expanded from my card base to my Very Vanilla piece. I used two different colours to give added interest.

I wanted to keep the card fairly simple, so I did some embossing and then created a 3D flower using several of my scallop circle punches from First Edition DSP, crumpled them and then spritzed them with some shimmer spritz. It added some shimmer and colour, plus it dries hard. To finish things off, I added a couple of pearls at the top.

Hope you'll play along... head on over to Sunday Stamps to check out what the rest of the Design Team has created for you!
Until next time, stay crafty!
Steph

12.18.2012

Yummy Goodness

These gingerbread cookies look good enough to eat thanks to the Scentsational stamp set and coordinating Holiday Collection Framelits.

Paper: Always Artichoke, Very Vanilla, Festival of Prints DSP Stack
Stamps: More Merry Messages, Scentsational
Ink: Chocolate Chip
Tools: Big Shot, Holiday Collection Framelits, 1-1/4" Scallop Punch
Accessories: Jewels, 1/8" Real Red Taffeta Ribbon, Red Dazzling Details
This isn't an original idea... there are many cards floating around the WWW with half-eating gingerbread cookies. I used the 1-1/4" Scallop Circle to take chunks out of my gingerbread cookies. Then I added some Dazzling Details and popped each up with Dimensionals.

The sentiment is from More Merry Messages and to finish off, I added some ribbon trim with a tiny bow and jewels for added detail and bling.

Until next time, stay crafty!
Steph

11.18.2012

Christmas Wreath for Sunday Stamps

It's Sunday, so that means another challenge over at Sunday Stamps! This week is a fun sketch challenge from Haley, hope you'll play along. Don't forget that every time you do this month, you'll be entered in a draw for a chance to win one of two $25 SU! gift certificates!

Paper: Crumb Cake, Very Vanilla, Gumball Green
Ink: Early Espresso
Tools: Big Shot, Woodgrain TIEF, Lacy Brocade TIEF,
Punches - large & small Scallop Circles, 1-1/4" Scallop Circle
Accessories: Cherry Cobbler Seam Binding Ribbon, Jewels


As I was typing out the supply list above, I realized I didn't use any stamps on this card! WHAT?! Well, I guess I didn't need any. haha. When I saw the sketch this week, I immediately thought it looked like a door, so, that's what I created!

My card base is a gate-fold. I embossed the panels with the Woodgrain TIEF and then added my next layer with a Christmas wreath. The wreath uses all our scallop circle punches, including the NEW 1-1/4". I popped up one of the layers with Dimensionals and added some sharpie-coloured jewels for some holiday sparkle. The ribbon is dual purpose - adds some elegance and keeps my "door" closed. :)

What do you think?


Until next time, stay crafty!
Steph

8.23.2012

Triple Time Stampin'

I'm sure this technique has many different names, but I'll refer it to Triple Time Stampin' as it was Dawn Olchefske's video that taught me how to do it.

I've seen many gorgeous cards created with this technique all over the web and they all look so different! I've wanted to try it for quite some time now and finally made one thanks to a fellow Demo, Laurie Reaume, who I had the pleasure of meeting at the Hamilton Regionals. She swapped with me and her swap used this technique. You can check out her card here.

Paper: Lucky Limeade, Whisper White
Ink: Daffodil Delight, Island Indigo, Perfect Plum, Riding Hood Red, Lucky Limeade, Chocolate Chip
Stamps: Quint-Essential Flower
Accessories: Button, Island Indigo Ruffled Ribbon, Jewels


Unlike other cards I've seen with this technique, I wanted some more dimension, so I decided to pop-up and layer my focal image and then add a button to the center. The Quint-Essential Flower Á La Carte Stamp was the perfect choice to accomplish this. Many of SU! punches coordinate perfectly with this stamp so that you can do as much, or as little layering as you please.

The following SU! punches work with this stamp set:
  • 2-3/8" Scallop Circle
  • 1-3/4" Scallop Circle
  • 1" Circle
  • 3/4" Circle
  • 1/2" Circle
This stamp is well worth the investment at only $10.95 cdn (w #126790) because of the endless possibilities you have with it! I'll be sure to feature some more cards with this stamp soon.

What do you think?

Until next time, stay crafty!
Steph

8.06.2012

For Royalty

Today's card uses colours from the Stampin' Royalty Colour Challenge this week. Here's the colour combo:


I think this colour combo would be great for Christmas (and I can't wait to try that out!), but I wasn't feeling Christmas today, so here's what I came up with:

Paper: Raspberry Ripple, Summer Starfruit, Gumball Green, Patio Party DSP
Ink: Gumball Green
Stamps: Circle Cirus
Tools: Simply Scored & Diagonal Plate, 1-1/4 Scallop Circle Punch, 1-3/8 Circle Punch
Accessories: Jewels
I started by scoring a faux quilted look using my Simply Scored with Diagonal Plate. I added a small border with a piece of DSP from the Patio Party pack and a small accent of Gumball Green card stock.

I stamped one of the stamps from Circle Circus in Gumball Green and punched it out using the 1-3/8" Circle Punch, mounting that on 1-1/4" scallop circles punched from Summer Starfruit. I popped the middle one with Dimensionals.

To finish things off, I thought the card could use a little bling. So, at every cross in my faux quilting, I added a tiny jewel.

I chose not to add a sentiment to this card so that it can be used for any occasion... or, I could always add one at a later date if I needed to.

What do you think?

Until next time, stay crafty!
Steph

6.11.2012

Royalty

I'm back, after a long hiatus. I've been busy over the last week working and creating, chasing my 2 year old around, attending a Demo event last weekend and watching the Euro. :) Don't worry though, I've got lots of posts and samples coming your way. In fact, it was hard to choose where to start...
Today, I have a post for the challenge over at Stampin' Royalty. It's my first time playing with the ladies over there. Here's the sketch for this week:

 
I decided to keep my design pretty simple. I used some new In Colors and the humming bird from Elements of Style. You're going to see me using this set a lot over the next while because I just recently got my inky hands on it and I LOVE IT! I accented with Baja Breeze, and used Midnight Muse (love it!!) and Summer Starfruit (learning to love it!) from the 5 new In Colors.

What do you think?

 
Like I said, I kept it pretty simple and other than the humming bird, didn't stamp any other images or sentiments. The Big Shot and punches were my friend for this card.


Until next time, stay crafty!
Steph

4.27.2012

For the Love of...

Books! The current trend seems to be anything beginning with a capital "E"... E-Readers, E-Mail, E-Learning, etc. You can find almost anything now online and it seems more rare to not do things electronically. Of course I appreciate you reading my blog, electronically, but what I'm getting at is that sometimes I just prefer to feel the paper in between my hands - books, magazines, and of course, hands-on paper crafting! So for those of you that still love to feel the paper in between your hands too, you might enjoy my magnetic bookmarks!

Check 'em out and let me know what you think.

Until next time, stay crafty!
Steph