Follow My Blog

Follow on Bloglovin
Showing posts with label alternative projects. Show all posts

1.31.2018

Paper Pumpkin Alternatives!

I'm excited to share more details with you today on some of my #redboxchallenge cards I created using past Paper Pumpkin Kits. Some pieces dating as far back as 2014! Gasp!!


You may have seen my above teaser on Instagram earlier today. As promised, I will go into more details on some of them... be prepared for a longer-than-normal post. ;)


Above is a quick & simple home decor piece I created with a 5x7" frame. I used the gold letter stickers you got in the June 2016 kit, Banner Surprise. It's not my greatest video (one of my firsts, actually and it's OK to laugh!), but check it out for a tip on getting those letters. ;)


See, a good laugh, right? So many errors... hehe.

Here come a few alternatives that use pieces from as far back as July 2014!! You'll see from the samples below how I combined many of the same pieces to create different designs.


This first one uses some star paper (it really was the "garbage pieces" from the shaker card components!) from the December 2014 kit, All Shook Up. I combined it with a few other elements from the current catalogue - doilies, Stampin' Blends and some paper.


Here's another example... do you see those stars again?! The blue star was a sticker from the July 2014 kit, Wish Big. I combined it again with the Stampin' Blends and the Color Me Happy Stamp Set. The "you" was die-cut with the Celebrate You Thinlits Dies... yours FREE with any $120 order.


Here are the stars again... but totally different card, eh?! On this card though, I used the "garbage piece" from the star stickers and created a background with it. I also combined those same elements, but also used the Epic Celebrations Stamp Set (free with any $60 order) and Shimmer Ribbon (also free with a $60 order). 


One last one with those stars... I know, I had a lot! This time though, I combined those 3-year-old kit pieces with a the recent kit from August 2017, Giftable Greetings. I added some Silver Thread and heat embossing.


These two (actually, I was able to create three), used pieces from the August 2017 kit, Giftable Greetings. I used the "garbage pieces" from the punched out flowers... maybe you see a trend here. haha. The stamp set is from the July 2017 kit, Positively Picturesque.

This last one is one of my favourites! I used the flowers and stamp from the August 2017 kit, Giftable Greetings, the leaves (flipped over to reveal the white side) are from the September 2017 kit, Layered Leaves and the detailed circle is from the October 2017 kit, Pining for Plaid. You'd think they were all from one kit!


As you can see, when you subscribe for a minimum of 3-months, you get a whole bunch of items that can work together to create new projects! Until March 31st is actually the best time to subscribe. When you purchase a 3, 6 or 12 month subscription, you can earn Sale-A-Bration freebies (up to 5!!), save money (on the 6 or 12 month subscriptions) AND, even earn Hostess Dollars when you purchase the 12-month subscription. How cool is that?! If you're considering the 12-month for $295, I highly suggest adding an additional $5 item so that your total gets up to $300, earning you 5 Sale-A-Bration freebies AND $30 in Hostess Dollars!

Hope I've inspired you if you have some of these kits lying around... and if you're not a subscriber, perhaps you're intrigued enough to give it a shot!

Until next time, stay crafty!
Steph

Product List
Heat Tool
[129053]
$40.00
Big Shot
[143263]
$136.00


7.15.2017

Christmas in July - Double Whammy!


I can't believe it's mid-July already! That not only means that it's time for another Blog Hop (yay!), but it's also Christmas in July (double yay!!). If you can believe it, this is the time of year that I start crafting and thinking up Christmas projects... and I've got TWO for you today!


Ok, seriously, how cute are these pigs?! I just couldn't resist dressing this guy up in a little Santa suit and hat, complete with cotton trimming. :) The stamp set is called This Little Piggy and the paper is from the Coffee Break DSP.


On the inside, I used Labeler Alphabet and a strip of DSP. Did you know that if you cut your 12" x 12" DSP down to 4" x 6" pieces, you can have a piece for the front and one for the inside when you cut 3/4" off. ;)


Here's a closer look at this cutie. Don't you just love when you're able to take your products further?! Did you think I could take some coffee paper and a pig and make a Christmas card??

Speaking of using "non-Christmas" products to make Christmas cards... my Paper Pumpkin arrived today and the kit was so cute, I just couldn't wait to play! However, I didn't create as intended. If you follow me, this shouldn't come as a surprise. haha


I used a few pieces from the kit, but then mixed it with the Oh, What Fun and Flurry of Wishes stamp sets and played a little with the Embossing Paste. That stuff is so cool!! When I saw the wooden mountains contained in the kit, I just thought of white tips and the paste was the perfect thing to make that happen, along with some falling snow. If you're wondering about that braided accent... it was created with the tissue paper that Paper Pumpkin kits come wrapped in.


On the inside, I mixed an image from the stamp set I received in the kit, along with one from Flurry of Wishes. I kept it pretty simple.


Here's a closer look at some of the detail. I did add some paste to areas on the stamped snowflakes, however, I'm not sure that really added much to the project.

Thanks for tuning into this long-winded post! I hope you enjoyed the two projects I shared with you today. I'd love to hear what you think!

Don't forget that this is a Blog Hop... so hop on over to my friends too:

1. Leena at A La Cards
2. Sandy at Lolly & Sand
3. Me, Steph at Hofkissed <<You Are Here

Until next time, stay crafty!
Steph

To purchase Stampin' Up! and to view all my classes & upcoming events, visit me at hofkissed.stampinup.net

3.19.2017

Alternative Projects for Paper Pumpkin March 2017

You know I love Paper Pumpkin... just as much as I love altering the kits every month to create something different then what was intended. ;) Yesterday, I posted a video to my YouTube Channel that walks you through the kit and then the projects I posted below. I promised in the video that I would post some still shots of the projects, so here they are!

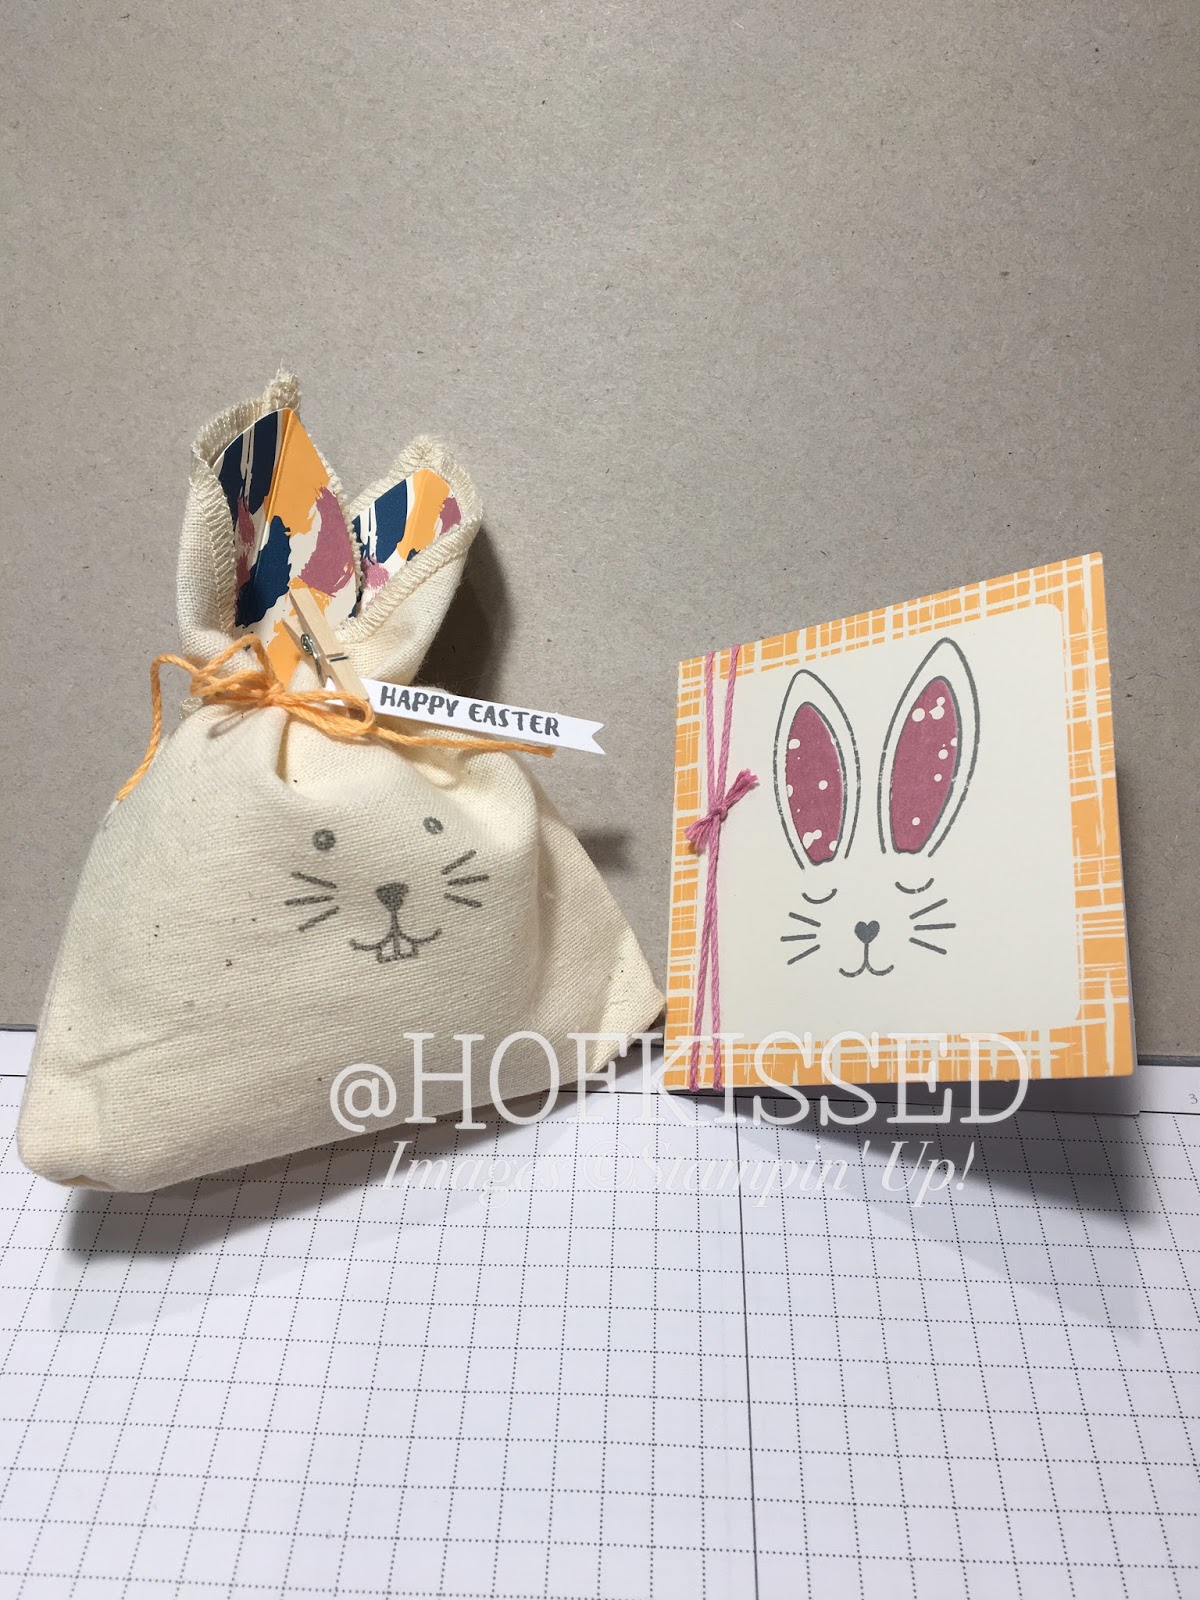
Here's what the kit makes - so adorable, right?! I really loved all the different faces you could stamp and how nicely you could stamp on the fabric bags.


By having some Note Cards and Envelopes on hand and the willingness to cut your kit apart a bit, you could create the following two cards...


I really enjoyed playing around with the stamp images in this kit! By doing some repeat stamping with the "eyes", "whiskers" and "mouth/nose" you can create some great backgrounds or patterns. Cool, eh?!  For the card on the right, I used one of the "ears" to create petals. I coloured them in with Watercolour Pencils and blended the colours together with a Blender Pen.


I explain more about the next two in the video, but I used the tissue paper that comes in every kit and applied it to the card front. It adds lots of interest and colour. I also created a shaker card - those are so fun!


Lastly, I turned those easter eggs into dinosaur eggs... and combined them with the No Bones About It stamp set. :)


Hope you loved these alternative projects! Don't forget, a 3-month Paper Pumpkin subscription is on sale until March 31st, and purchasing one before the end of the month qualifies you for a FREE Sale-A-Bration product. It's a win-win! In addition, Sara Douglass (CEO of Stampin' Up!) has created April's kit and included a free gift to everyone inside each kit!! Can't wait to see what it is... don't forget to subscribe by April 10th if you want in on her kit.

Here's the video:


Until next time, stay crafty!
Steph

To purchase Stampin' Up!, or for more info, please visit my site at www.hofkissed.stampinup.net