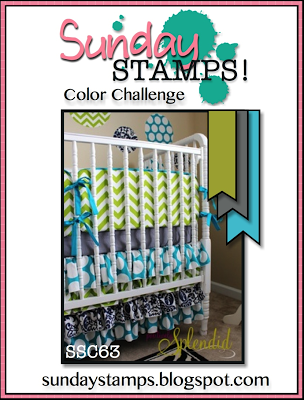
Welcome to another week at Sunday Stamps! So excited to have you join us, and to welcome our new DT member Leena! For the next two weeks, we've got a sketch for ya, and here's what I came up with.
I stuck very closely to the sketch, as you can see. I used some specialty paper from the retired Candlelight Christmas DSP as my focal point. I loved the felting on acetate. From there, I stuck with the reds & used some card stock & glimmer paper along with some Real Red Grosgrain Ribbon (retired).
The tags I punched using the Scallop Tag Topper Punch but instead of using paper that was 2" wide, I cut it down to 1-1/2" and it fit nicely between the scallops at the top.
On the inside, I added some more ribbon, anchoring my sentiment. I really love how this turned out!
I hope that you'll be inspired by this sketch and play along. You have until Friday, September 19th at 6 p.m. to link up and don't forget to check out what the other DT members have created to inspire you!
Until next time, stay crafty!
Steph
RECIPE:
Paper: Soft Suede, Early Espresso, Whisper White
Ink: Early Espresso, Real Red
Stamps: Seasonal Sayings
Tools: 7/8" Scallop Circle Punch, Scallop Tag Topper Punch, Big Shot, Vintage Wallpaper TIEF (retired)
Accessories: Real Red 1/4" Grosgrain Ribbon (retired)
Challenge: Sunday Stamps
Showing posts with label Theme: Christmas. Show all posts
9.07.2014
8.28.2014
The Holidays!
The holidays come early today for all Stampin' Up! fans... the holiday catalogue goes live!! It's always an exciting time for me and gotta love all the new products! Unfortunately, I was only able to put in a tiny pre-order and have not been able to play with what I got yet. :( BUT, I do have a holiday card for you today to celebrate. Check it out:
For the inside, I stamped the same pattern and added a few more key sequins. I opted out of any inside text. I always decorate the inside to match the outside, but it's not often I add a stamped sentiment.
What do you like to do on the inside of your cards?
Until next time, stay crafty!
Steph
RECIPE:
Paper: Baked Brown Sugar, Soft Suede, Gold Foil, Whisper White
Ink: Pistacio Pudding, Old Olive, Real Red, Baked Brown Sugar
Stamps: Flower Patch, Petite Pairs
Tools: Big Shot, Stylish Stripes TIEF, Punches: Word Window & Modern Label
Accessories: Buttons (all retired), Sequins
Now, you may be asking yourself "what Christmas set is that?". It's not! I used a few key pieces from the Flower Patch stamp set in the Annual Catalogue. As I wrote yesterday, it's a MUST-HAVE set, in my opinion. So much versatility, "bang for your buck" and the Photopolymer is so awesome for the layering effects you can achieve with this set!
For the inside, I stamped the same pattern and added a few more key sequins. I opted out of any inside text. I always decorate the inside to match the outside, but it's not often I add a stamped sentiment.
What do you like to do on the inside of your cards?
Until next time, stay crafty!
Steph
RECIPE:
Paper: Baked Brown Sugar, Soft Suede, Gold Foil, Whisper White
Ink: Pistacio Pudding, Old Olive, Real Red, Baked Brown Sugar
Stamps: Flower Patch, Petite Pairs
Tools: Big Shot, Stylish Stripes TIEF, Punches: Word Window & Modern Label
Accessories: Buttons (all retired), Sequins
8.22.2014
Very Merry
Here's a new design for you! Inspired from various different magazine sources - using border punches, strips of paper & pleating with paper.
Recently, I spent a few days away from home and when deciding what craft stuff to bring along, I turned to the paper stacks from Stampin' Up! This one is no longer available, but I barely even used it. Gasp! Anyway, I choose to take these along because they're perfect for card making, plus, it helped me to choose what solid card stock to take also. I was able to take along a lot of patterned paper (because I have several packs) and limited card stock. :)
I cut about 1" strips and then punched one side with my Scallop Border Punch. I mixed eight strips together and angled them randomly on my card base. The base of my card is only 3-3/4" wide because I wanted my pleated strip to hang over the edge to create extra interest. I finished off with a button (retired), some twine and a couple of Candy Dots.
Hope you like it!
Until next time, stay crafty!
Steph
RECIPE:
Paper: Naturals White, Fresh Prints Paper Stack
Ink: Real Red
Stamps: And Many More
Tools: Scallop Border Punch
Accessories: Button, Twine & Subtles Candy Dots
Recently, I spent a few days away from home and when deciding what craft stuff to bring along, I turned to the paper stacks from Stampin' Up! This one is no longer available, but I barely even used it. Gasp! Anyway, I choose to take these along because they're perfect for card making, plus, it helped me to choose what solid card stock to take also. I was able to take along a lot of patterned paper (because I have several packs) and limited card stock. :)
I cut about 1" strips and then punched one side with my Scallop Border Punch. I mixed eight strips together and angled them randomly on my card base. The base of my card is only 3-3/4" wide because I wanted my pleated strip to hang over the edge to create extra interest. I finished off with a button (retired), some twine and a couple of Candy Dots.
Hope you like it!
Until next time, stay crafty!
Steph
RECIPE:
Paper: Naturals White, Fresh Prints Paper Stack
Ink: Real Red
Stamps: And Many More
Tools: Scallop Border Punch
Accessories: Button, Twine & Subtles Candy Dots
12.10.2013
Team Swap
Every month for the last few months, we've done a team swap. This past month the idea was a holiday card in non-traditional colours. I was still feeling Christmas cards, so that's what I did:
I got the inspiration from a card on Pinterest by Vicki Wu and the Eastern Elegance DSP. I love the colours and designs in it and thought "I could make that work for a Christmas card!". I pulled the colours from the DSP - Summer Starfruit and Smokey Slate and as my neutral, I used Naturals White.
I heat embossed the Beautifully Baroque stamp in Smokey Slate and used the coordinating TIEF of the same name for the background. I heat embossed the sentiment (inside & out) using Silver because I wanted it to stand out more... and what's a Christmas card (or any card for that matter) without some bling?! I randomly adhered some jewels and used some Silver Glimmer Paper. I gotta tell you, I am loving the look of scattering jewels randomly on a project. You should try it out!
Until next time, stay crafty!
RECIPE:
Paper: Naturals Ivory, Eastern Elegance DSP, Summer Starfruit
Ink: Summer Starfruit
Stamps: Beautifully Baroque, Petite Pairs
Tools: 1-3/8" Circle Punch, 1-3/4" Circle Punch, Beautifully Baroque TIEF, Big Shot
Accessories: Jewels, Summer Starfruit Satin Stitched Ribbon
Techniques: Heat Embossing
I got the inspiration from a card on Pinterest by Vicki Wu and the Eastern Elegance DSP. I love the colours and designs in it and thought "I could make that work for a Christmas card!". I pulled the colours from the DSP - Summer Starfruit and Smokey Slate and as my neutral, I used Naturals White.
I heat embossed the Beautifully Baroque stamp in Smokey Slate and used the coordinating TIEF of the same name for the background. I heat embossed the sentiment (inside & out) using Silver because I wanted it to stand out more... and what's a Christmas card (or any card for that matter) without some bling?! I randomly adhered some jewels and used some Silver Glimmer Paper. I gotta tell you, I am loving the look of scattering jewels randomly on a project. You should try it out!
Until next time, stay crafty!
Steph
RECIPE:
Paper: Naturals Ivory, Eastern Elegance DSP, Summer Starfruit
Ink: Summer Starfruit
Stamps: Beautifully Baroque, Petite Pairs
Tools: 1-3/8" Circle Punch, 1-3/4" Circle Punch, Beautifully Baroque TIEF, Big Shot
Accessories: Jewels, Summer Starfruit Satin Stitched Ribbon
Techniques: Heat Embossing
12.01.2013
It's Sketchy at Sunday Stamps!
It's a sketch bi-week at Sunday Stamps, starting today. It's a great one too, designed by fellow DT member Hayley! Check it out:
Can you believe it's December already?! I can't believe how fast this year has flown by... I've been making Christmas cards since August and although I'm getting a bit sick of doing them, I still have a few more left in me. :) I got creative with the Merry Little Christmas Simply Created Card Kit that's in the Holiday Catalogue. It's a great kit, for only $11.95, you can make 8 cards! It's even better when you stretch it... so far I've made double that, and I still have pieces left over. :)
This was one of the designs I came up with for my card buffet yesterday. The ladies really loved it. So simple and so easy, thanks in part to the kit & Hayley's awesome sketch!
Hope you can join us and don't forget to check out the other DT member's designs. Visit their Blogs and leave them some love too!
You have until December 13th to play along!
Until next time, stay crafty!
Steph
RECIPE:
Paper: Coastal Cabana, Real Red, Gumball Green
Ink: Gumball Green, Real Red
Stamps: No Peeking (retired)
Kit: Merry Little Christmas Simply Created
Tools: Big Shot, Holiday Collection Framelits (retired)
Accessories: Cherry Cobbler Dazzling Details (on sale now until December 2nd!)
Can you believe it's December already?! I can't believe how fast this year has flown by... I've been making Christmas cards since August and although I'm getting a bit sick of doing them, I still have a few more left in me. :) I got creative with the Merry Little Christmas Simply Created Card Kit that's in the Holiday Catalogue. It's a great kit, for only $11.95, you can make 8 cards! It's even better when you stretch it... so far I've made double that, and I still have pieces left over. :)
This was one of the designs I came up with for my card buffet yesterday. The ladies really loved it. So simple and so easy, thanks in part to the kit & Hayley's awesome sketch!
Hope you can join us and don't forget to check out the other DT member's designs. Visit their Blogs and leave them some love too!
You have until December 13th to play along!
Until next time, stay crafty!
Steph
RECIPE:
Paper: Coastal Cabana, Real Red, Gumball Green
Ink: Gumball Green, Real Red
Stamps: No Peeking (retired)
Kit: Merry Little Christmas Simply Created
Tools: Big Shot, Holiday Collection Framelits (retired)
Accessories: Cherry Cobbler Dazzling Details (on sale now until December 2nd!)
11.18.2013
Sunday Stamps - Late Again!
A day late, but here's my design for this week's Sunday Stamps Colour Challenge. It's a sweet combo of lime, grey & turquoise.
I used Gumball Green, Bermuda Bay & Smokey Slate from Stampin' Up! as my colours. SU! doesn't really have a current "lime" colour anymore, but I thought Gumball Green was a close call and worked really well for this combo. A combo that I really grew to like and think will use again!
I kept it really simple, using the current hostess set in the Holiday Catalogue - Warmth & Wonder. I'm totally in love with the tree. The sentiment is from the same set (gotta love that!) and after adding a few jewels, my card was complete.
Hope you can join us. Remember, it's a bi-weekly challenge, so you have until Friday, November 29th. Don't forget to check out the rest of the Design Team Blogs too and leave them some love. Their designs are sure to inspire you.
Until next time, stay crafty!
RECIPE:
Paper: Gumball Green, Smokey Slate, Whisper White
Ink: Smokey Slate, Bermuda Bay
Stamps: Warmth & Wonder
Accessories: Jewels
I used Gumball Green, Bermuda Bay & Smokey Slate from Stampin' Up! as my colours. SU! doesn't really have a current "lime" colour anymore, but I thought Gumball Green was a close call and worked really well for this combo. A combo that I really grew to like and think will use again!
I kept it really simple, using the current hostess set in the Holiday Catalogue - Warmth & Wonder. I'm totally in love with the tree. The sentiment is from the same set (gotta love that!) and after adding a few jewels, my card was complete.
Hope you can join us. Remember, it's a bi-weekly challenge, so you have until Friday, November 29th. Don't forget to check out the rest of the Design Team Blogs too and leave them some love. Their designs are sure to inspire you.
Until next time, stay crafty!
Steph
RECIPE:
Paper: Gumball Green, Smokey Slate, Whisper White
Ink: Smokey Slate, Bermuda Bay
Stamps: Warmth & Wonder
Accessories: Jewels
11.06.2013
So Sorry!
I'm so sorry for the long hiatus! It was my every intention to get my posts all lined up to post over the last couple of weeks when I was extremely busy, but I just didn't have the time. I promise to now make a better effort, even though still very busy. :)
This card uses one of the frames from a punched out tag from the Pop & Place Tags. I heat embossed the sentiment & ornaments & then added some of the gorgeous silver ribbon that I'm in love with! It's just perfect for tying little bows.
Until next time, stay crafty!
RECIPE:
Paper: Cherry Cobbler, Whisper White
Stamps: Ornament Keepsakes, Christmas Messages
Tools: Heat Tool
Kit: Pop & Place Tags
Accessories: 1/8" Silver Ribbon
Techniques: Heat Embossing
This card uses one of the frames from a punched out tag from the Pop & Place Tags. I heat embossed the sentiment & ornaments & then added some of the gorgeous silver ribbon that I'm in love with! It's just perfect for tying little bows.
Until next time, stay crafty!
Steph
RECIPE:
Paper: Cherry Cobbler, Whisper White
Stamps: Ornament Keepsakes, Christmas Messages
Tools: Heat Tool
Kit: Pop & Place Tags
Accessories: 1/8" Silver Ribbon
Techniques: Heat Embossing
10.26.2013
Where Are You?
Is something you may have been asking? Well, I've been swamped with prepping for shows, motherhood, house renos, etc. I had a very successful show last week. One of the best sellers were these tiny tins (intended as a hostess gift). In the tin I included 40 various gift tags and a roll of tape to give the recipient everything they needed for gift giving.
Well, people loved them so much, they were also buying them for themselves. I sold out and had orders for 20+ more!! So guess what I've been doing... making over 800 tags and trying for more because I would like to have these available at my show on the 3rd too! Anyway, thankfully a good portion of my tags came from the awesome Pop & Place Holiday Gift Tags. You can make 70+ tags and the stamp set is perfect. Leave it to me to stretch this kit to the limit!! I used every punch, every template and every piece of scrap I can use from the entire booklet, including the front & back covers. Pictures of the tags will come soon, but I also wanted to share with you that I created several cards with it too. Here's one of them:
The Crumb Cake frame is indeed from the booklet. All I did was emboss it, mount it, did a little stamping and viola! Each booklet got me 4 of these cards and I can't wait to show you what else I created with them. Think again before you discard all those pieces you think you don't need. ;)
Until next time, stay crafty!
Steph
RECIPE
Paper: Soft Suede, Whisper White, Cherry Cobbler
Ink: Cherry Cobbler
Stamp Set: Joyful Christmas
Tools: Big Shot, Fancy Fan TIEF, Heat Gun, Embossing Powder - Silver & Cherry Cobbler
Accessories: Jewels
Well, people loved them so much, they were also buying them for themselves. I sold out and had orders for 20+ more!! So guess what I've been doing... making over 800 tags and trying for more because I would like to have these available at my show on the 3rd too! Anyway, thankfully a good portion of my tags came from the awesome Pop & Place Holiday Gift Tags. You can make 70+ tags and the stamp set is perfect. Leave it to me to stretch this kit to the limit!! I used every punch, every template and every piece of scrap I can use from the entire booklet, including the front & back covers. Pictures of the tags will come soon, but I also wanted to share with you that I created several cards with it too. Here's one of them:
The Crumb Cake frame is indeed from the booklet. All I did was emboss it, mount it, did a little stamping and viola! Each booklet got me 4 of these cards and I can't wait to show you what else I created with them. Think again before you discard all those pieces you think you don't need. ;)
Until next time, stay crafty!
Steph
RECIPE
Paper: Soft Suede, Whisper White, Cherry Cobbler
Ink: Cherry Cobbler
Stamp Set: Joyful Christmas
Tools: Big Shot, Fancy Fan TIEF, Heat Gun, Embossing Powder - Silver & Cherry Cobbler
Accessories: Jewels
10.03.2013
Santa Suit
Here's a fun and cute card for ya:
The pieces were actually leftover from a gum packet covering that I created last year (yes, I kept the pieces for an entire year!). I never got around to putting them all together. Those gum packs were a bust - too time consuming and not very popular compared to my other offerings. But I think these cards will be a hit!
What do you think?
You can purchase them here in my online store.
Until next time, stay crafty!
RECIPE
Paper: Basic Black, Whisper White, Real Red
Ink: Real Red
Stamps: Delightful Decorations (retired)
Tools: Big Shot, Petals-a-Plenty TIEF, Curly Label Punch, 1/2" Circle Punch
Accessories: Glimmer Brads
Techniques: Dry Embossing
The pieces were actually leftover from a gum packet covering that I created last year (yes, I kept the pieces for an entire year!). I never got around to putting them all together. Those gum packs were a bust - too time consuming and not very popular compared to my other offerings. But I think these cards will be a hit!
What do you think?
You can purchase them here in my online store.
Until next time, stay crafty!
Steph
RECIPE
Paper: Basic Black, Whisper White, Real Red
Ink: Real Red
Stamps: Delightful Decorations (retired)
Tools: Big Shot, Petals-a-Plenty TIEF, Curly Label Punch, 1/2" Circle Punch
Accessories: Glimmer Brads
Techniques: Dry Embossing
9.21.2013
Holiday Napkins
Whether you're throwing a holiday party this season, or attending one, these napkins will be a hit!
Who would've thought to emboss napkins?! Well, someone did (I found it on Pinterest). I wish the post was linked to the creator, but it wasn't. I would love to give proper credit...
Anyway, these are so simple to make. All you need is your Big Shot and an embossing folder of your choice. They're perfect to use at your party, or package them up and give them as a gift at a party you're attending.
If you don't have the tools or the time to make these yourself, you can buy them from my online store here.
Until next time, stay crafty!
Steph
![]() |
| Tools: Big Shot, Northern Flurry TIEF |
Anyway, these are so simple to make. All you need is your Big Shot and an embossing folder of your choice. They're perfect to use at your party, or package them up and give them as a gift at a party you're attending.
If you don't have the tools or the time to make these yourself, you can buy them from my online store here.
Until next time, stay crafty!
Steph
8.11.2013
No Peeking for Sunday Stamps
It's a sketch challenge today at Sunday Stamps! I've been so excited for this one... check it out:
I created this card a while ago and am just noticing now how dark my picture is. Sorry about that! Anyway, Joan created such a great sketch for this week's challenge - it's so versatile! I know I'm using a retired set, but I just couldn't resist bringing out these adorable guys again this year.
Paired with some Washi Tape and a few jewels, this card took less than 10 minutes! Of course, I didn't forget the inside either:
I hope you'll play along with us - the challenge is open for two weeks. Be sure to check out what the rest of the Design Team has created to get you inspired and we look forward to seeing what you create!
![]() |
| Paper: Cherry Cobbler, Whisper White Ink: Cherry Cobbler Stamps: No Peeking Tools: Artisan Label, 1-3/8" Circle Punch Accessories: Washi Tape, Jewels |
Paired with some Washi Tape and a few jewels, this card took less than 10 minutes! Of course, I didn't forget the inside either:
I hope you'll play along with us - the challenge is open for two weeks. Be sure to check out what the rest of the Design Team has created to get you inspired and we look forward to seeing what you create!
Until next time, stay crafty!
Steph
8.08.2013
Ripped Paper
How fun is this card?!
I was working on another card when I had the idea for this one. So simple, eh?! I thought it would look like ripped wrapping paper. Once I had them all glued, I curled up the ends a bit. I used the same idea on the inside of my card too. Love this one!
Until next time, stay crafty!
Steph
![]() |
| Paper: Brights DSP Stacks - Old Olive & Real Red used (retired), Naturals Ivory Ink: Old Olive Stamps: Wacky Wishes (retired) Accessories: Jewels |
Until next time, stay crafty!
Steph
8.07.2013
Button Ornaments #2
I somewhat CASEd the idea from a card I created last year (found here). Really, the only thing that is the same is the use of buttons.
What do you think?
Until next time, stay crafty!
Steph
What do you think?
Until next time, stay crafty!
Steph
7.31.2013
Feather Wreath
Well, it's the last day of my Christmas in July sale (check out the product here), so I thought I'd show you another Christmas card:
This is likely not the last Christmas card you'll see from me (I've got TONS more and it's only July!), but one I wanted to show you sooner than later. I loved the Fine Feathers stamp set the moment I saw it in last year's catalogue. Sad to say though, I haven't used it too much as I've had trouble figuring it out.
Several months ago I did a happy dance because I had this vision of a feather wreath. I spend FOREVER executing my vision (several different ways) and all were epic fails! Last night I was perusing the internet and saw an image that was literally a few blurred swirls that formed a circle and that set off the light bulb. I ran to my craft loft, punched a hole in my paper and got to work.
This card is the result of that, and I love it! I finished it without the ribbon and liked it a lot, but felt it needed a little something else. I remembered about that gorgeous silver ribbon I pre-ordered from the Holiday Catalogue (live tomorrow!) and added a tiny bow. Perfect!
I know this turned out to be a long winded post, but happy you made it through. I thought my readers would want to know a little back story behind this card. I know it's not everyone's taste - non traditional colours and images - but I'm in love because I'm really happy with how it turned out and that my vision finally came to light!
Until next time, stay crafty!
Steph
This is likely not the last Christmas card you'll see from me (I've got TONS more and it's only July!), but one I wanted to show you sooner than later. I loved the Fine Feathers stamp set the moment I saw it in last year's catalogue. Sad to say though, I haven't used it too much as I've had trouble figuring it out.
Several months ago I did a happy dance because I had this vision of a feather wreath. I spend FOREVER executing my vision (several different ways) and all were epic fails! Last night I was perusing the internet and saw an image that was literally a few blurred swirls that formed a circle and that set off the light bulb. I ran to my craft loft, punched a hole in my paper and got to work.
This card is the result of that, and I love it! I finished it without the ribbon and liked it a lot, but felt it needed a little something else. I remembered about that gorgeous silver ribbon I pre-ordered from the Holiday Catalogue (live tomorrow!) and added a tiny bow. Perfect!
I know this turned out to be a long winded post, but happy you made it through. I thought my readers would want to know a little back story behind this card. I know it's not everyone's taste - non traditional colours and images - but I'm in love because I'm really happy with how it turned out and that my vision finally came to light!
Until next time, stay crafty!
Steph
7.24.2013
Pleated Tree
I was inspired to create this tree from a video series I'm watching called Paper Arts. It's pretty awesome actually... takes you through the basics of gift wrapping (my favourite thing to do!) to more tips and tricks when working with paper.
I was watching the segment last night about pleating for gift wrapping and I got the idea to create a Christmas tree with this technique. Perhaps there's something like this out there that exists already, but I haven't seen it, so I'm taking full credit for this! :)
This was quite simple to do. I started with a 6x6 piece of DSP and folded so that the bottom of my tree fanned out. I wanted a star at the top of the tree, but didn't have one big enough, so I thought "why not make one from the mini ornament punch?!" So, that's what I did. Pretty cool, eh?
I added some bling onto the tree and then used the remaining portion of my pleated piece on the inside of my card. I guess this is going to be my version of a paper folded tree this season. I seem to do one every year. :) Here is my tutorial for last year's folded tree.
If there's enough interest, I can do up a tutorial for this one... leave me some love if you're interested!
Until next time, stay crafty!
Steph
I was watching the segment last night about pleating for gift wrapping and I got the idea to create a Christmas tree with this technique. Perhaps there's something like this out there that exists already, but I haven't seen it, so I'm taking full credit for this! :)
![]() |
| Paper: Brights DSP Stack (retired), Whisper White Tools: Big Shot, Perfect Polka Dots TIEF, Ornament from Merry Minis Punch Pack Accessories: Jewels Techniques: Paper Pleating |
I added some bling onto the tree and then used the remaining portion of my pleated piece on the inside of my card. I guess this is going to be my version of a paper folded tree this season. I seem to do one every year. :) Here is my tutorial for last year's folded tree.
If there's enough interest, I can do up a tutorial for this one... leave me some love if you're interested!
Until next time, stay crafty!
Steph
7.22.2013
Using Scraps
If you saw my series on scraps, then you know that I save every little piece of paper. :) The other day I showcased a card and today's post uses scraps from that card. You can check out the post here.
Usually I don't save the tiny scraps from the Lattice Bigz Die, but because I cut it out using Glimmer Paper, I thought about saving them and using them in another cutout. I chose Whisper White and went with the Silver Specialty paper for my card base.
![]() |
| Paper: Silver Specialty, Whisper White, Real Red, Silver Glimmer Paper Stamps: Greetings of the Season Tools: Big Shot, Petals-a-Plenty TIEF, Lattice Bigz Die, Artisan Label Punch, XL Oval Punch |
I wanted this card to be shimmery and simple, so I stuck with similar tones, and added a pop of red (also a scrap, by the way!). I heat embossed the sentiment and at the last minute decided to emboss my red banner. Glad I did it.
Until next time, stay crafty!
Steph
7.18.2013
Why I Love Pinterest
Today's card is CASEd from Brian King (found on Pinterest). I just loved the look and altered it slightly to give it a Christmas feel.
There is actually no stamping on this card! No sentiments either... I thought about making this a "blank" Christmas card so that people could write their own message and sentiment. It could therefore be used as a thank you card during the holidays or given to someone who doesn't celebrate the Christmas season.
Why do I love Pinterest? Because I often find out things like the Lattice Bigz Die and the Window Framelits fit perfectly together to create a beautiful card! Love it...
Until next time, stay crafty!
Steph
![]() |
| Paper: Whisper White, Real Red, Silver Glimmer Tools: Big Shot, Lattice Bigz Die, Window Framelits |
Why do I love Pinterest? Because I often find out things like the Lattice Bigz Die and the Window Framelits fit perfectly together to create a beautiful card! Love it...
Until next time, stay crafty!
Steph
7.15.2013
Pierced Ornaments
Today I have another Christmas card I created. The only stamp I used on this card is for the sentiment. The rest is paper pierced. Check it out:
I used the ornament Paper Piercing Template to pierce my ornaments of choice. Once that was done, I used my Stampin' Write Markers to "connect the dots"... this gives the look of stitching. I fooled around a bit with my Blender Pen and moved some the ink around to give the ornaments some colour.
I added some ribbon to the top of each ornament and A LOT of bling with some jewels.
Until next time, stay crafty!
Steph
![]() |
| Paper: Crumb Cake, Very Vanilla Ink: Gumball Green, Raspberry Ripple, Early Espresso Stamps: More Merry Messages Tools: Big Shot, Stripes TIEF, Paper Piercing Accessories: Jewels, Stitched Satin Ribbon |
I added some ribbon to the top of each ornament and A LOT of bling with some jewels.
Until next time, stay crafty!
Steph
7.12.2013
Christmas in July Series - Post 5
This has got to be one of my favourite cards from this series so far. I just love how it turned out and I'm quite proud of myself for really pushing my brain for this one!
I used some grade school skills for this card... I cut a template from a piece of scrap paper and then randomly stamped one of the butterfly images, making sure to get into my pointed corners. The delicate design really worked for this:
Now I really set the bar high for myself on using non Christmas stamps for this series! But I gotta tell you, this has really helped me to be more creative and think about my stamps in a completely different way. I might have to try doing this series for another occasion later on, but for now, I can't stop making non-Christmas Christmas cards!
Until next time, stay crafty!
Steph
I used some grade school skills for this card... I cut a template from a piece of scrap paper and then randomly stamped one of the butterfly images, making sure to get into my pointed corners. The delicate design really worked for this:
![]() |
| I used the middle butterfly on the right. |
Now I really set the bar high for myself on using non Christmas stamps for this series! But I gotta tell you, this has really helped me to be more creative and think about my stamps in a completely different way. I might have to try doing this series for another occasion later on, but for now, I can't stop making non-Christmas Christmas cards!
Until next time, stay crafty!
Steph
7.11.2013
Christmas in July Series - Post 4
Good morning and welcome to the fourth post in this series. If you're just tuning in for the first time, I'm showcasing cards that use non Christmas stamps to make Christmas cards! Here's today's:
Hope this series is inspiring you to use your non Christmas stamps to think outside the box!
Check back tomorrow... you won't believe what stamp set I used to make a Christmas card. :)
Until next time, stay crafty!
Steph
Hope this series is inspiring you to use your non Christmas stamps to think outside the box!
Check back tomorrow... you won't believe what stamp set I used to make a Christmas card. :)
Until next time, stay crafty!
Steph
Subscribe to:
Posts (Atom)