Follow My Blog

Follow on Bloglovin

2.15.2019

Humming Along with Stamping Symphony

It's the 15th and that means another Blog Hop with some of my favourite ladies. Today I'm featuring a simpler card, but with lots of colouring & a couple of techniques.


Have you discovered our AWESOME Blends yet? Blends are a alcohol blending marker and they are extremely easy to use. You can use them to colour just about anything - embellishments, papers, fabrics, Window Sheets, vellum & more!

This stamp set offers big, bold images. However, there is just one flower. To give the flowers depth, I used the "Masking Technique" to layer the images just right (see video below). Here are a few basic steps to "masking":

  • Stamp the image you want masked on a piece of lightweight paper (i.e. copy paper)... sticky notes work great, but I didn't have one large enough for this image.
  • Cut it out with scissors - "fussy cut". This is your "mask". 
  • Stamp your image on your project and then before stamping the next one, lay your "mask" overtop and stamp again. Continue doing so until you get the look you want.


You know I love adding something to the inside of the card too. The large, bold flower was the right choice and allowed me to add colour with my Blends.


Let's talk about that humming bird. I used my Stamparatus to stamp the image three times with StazOn Ink. Using the tool allowed for perfect placement so that I could get a bolder image. Next, I flipped it over and coloured with some Blends. Once finished, I adhered the image to some Glimmer Paper with Glue Dots, tucking those in behind the thicker lines. While there are dies for the stamp set (see below), I opted to fussy-cut the image with my Paper Snips, I thought that would look much better.

Before gluing the layer to my card base, I wrapped some Organdy Ribbon around for interest. Unfortunately this is not longer available as a freebie during Sale-A-Bration, but did you catch up top that I said you can colour fabric with Blends?! Grab your favourite ribbon & give it a try. ;)

Before I go...

Did you know I have a group on Facebook called Hofkissed VIP's? I post challenges, promotions & more. A couple of weeks ago, I shot a video on the "Masking Technique". If the description above didn't help you much, check it out. ;)


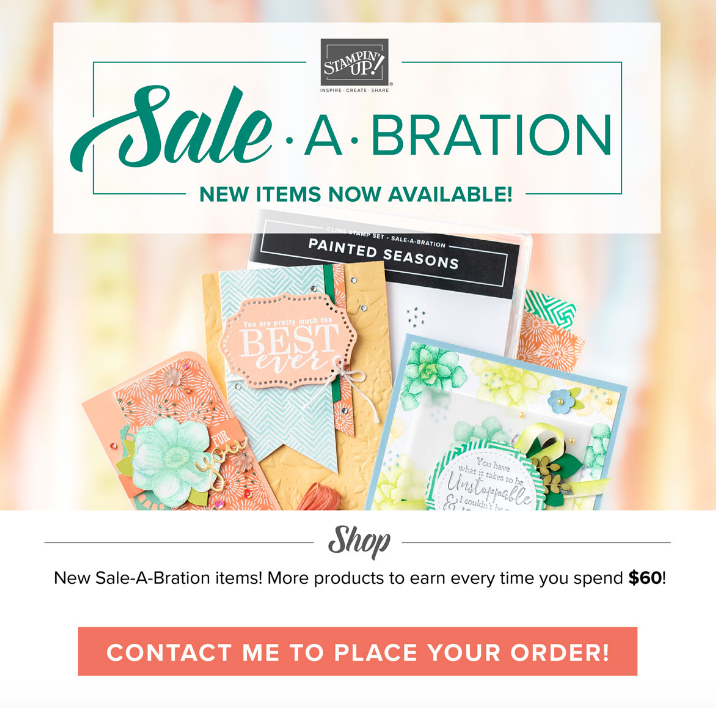
Today is also the day for the second-release of Sale-A-Bration items! You can still order from the first batch of freebies, but now there are a few more. Check them out here: Second Release PDF

You can find a list of all the products I used below. If you don't have a Stampin' Up! Demonstrator &/or you have a question or two, don't be afraid to reach out HERE.


Now, don't forget to hop along to all the other awesome people below. ;)


1. A La Cards (Leena)
2. Lolly & Sand (Sandy)
3. justBstamping (Barb)
4. Stamping with Jen (Jen)
5. Hofkissed (Steph) << You Are Here


Until next time, stay crafty!
Steph


Product List
Stamparatus
[146276]
$67.00
Glue Dots
[103683]
$7.25

2.07.2019

Home Decor Est. 2008

Hello! Surprised to hear from me?! Well, I'm trying to post at least a few times per month now instead of just on the 15th for our monthly Blog Hop. I always share a ton of projects on my Instagram & Facebook Page, but sometimes it's nice to get more of a description, isn't it?!

Today I'm happy to share that I completed my home decor piece, one that is a part of my trilogy of framed pieces that hang at my front door. The two in the first picture below are the ones that hang permanently and the middle one (see last picture), I switch out with a seasonal piece.


To mimic the same look as the first one I created back in the Fall (Home Sweet Home), I used the same colour scheme. Even though it's not using all the same pieces, the two work together nicely.


I started with a piece of 12x12 Designer Series Paper from my stash (this was a part of the now retired pack of Farmhouse DSP from the Holiday 2018 Catalogue). I loved the woodgrain look of it. To add the colour, I used the Sponge Brayer. The brayer is so easy to use and a great way to add colour. Here are three easy steps:

  1. Ink up the sponge by gently rolling it across your ink pad
  2. Starting off the edge of your page, roll the brayer across your project; back & forth
  3. Repeat steps 1 & 2 until you get the desired look, slowly building up the ink
To get an even greater gradient of colour, I used three shades of purple. I started with the lightest shade on the bottom 2/3 of the sheet & then the medium shade, finishing off with the darkest. I always started at the bottom & worked my way up. Make sure you are always starting/stopping & lifting the brayer off the page to avoid streaks.

After brayering, I stamped one of the heart images from the AWESOME stamp set (not just for Valentine's!) called Meant to Be. The set is bundled with an equally awesome die set. I didn't use it on this project, but included the information below. ;) You're going to want it... especially bundled because you save 10%!!

Now, let's talk again about those hearts again. I accidentally stamped a heart without inking it first. ACK! Thank goodness I still had my Stamp-A-Ma-Jig around! To be honest, I don't use it very often, but it is quite the handy tool to have. If you don't have one yet, you can currently get it off the Clearance Rack... but hurry, it won't be there forever. 


By stamping the image on a piece of plastic (one is included with the tool), I was able to line up the image perfectly. Phew! It was obviously a bit darker, but at least my entire project wasn't ruined... it was a project-safer!


After all the inking & stamping was done, I cut the letters I needed, in the shades of paper I wanted, using the Large Letters Framelits Dies. They're on the pricer side, but well worth the investment if you do a lot of projects (& great for kids projects too!). I popped them up using the Mini Dimensionals & cutting some in half were perfect for the narrower widths.


The "Est. 2008" was cut with some long retired dies from Stampin' Up! and glued flat with Tombow Multipurpose Adhesive.

Here are the three projects hanging at my front door... when they were all hung up together, I did a happy dance. Do you ever get giddy when a project turns out the way you envisioned it?!


I hope you enjoyed this long-winded post. haha. Making your own home decor pieces can be rewarding & make your home feel more "you". If you don't enjoy it, then consider commisioning me to make a piece that you can admire! ;)

Until next time, stay crafty,
Steph

Below are a list of products I used on this featured project. To visit my store & see all current product & promotions, go to www.hofkissed.stampinup.net 

Product List
Big Shot
[143263]
$150.00