Yesterday I shared with you the boy version I created and promised you the girl version today. You can view yesterday's post here, or get a glimpse of it peeking out from behind in the photo below. :)
I just love this new set (Something for Baby)! It launches today in the new catty. I kept the card CAS so that the focus is only on the onsie. All the elements are the same as the boy version, but I added a few flowers that I punched using the Itty Bitty Punch Pack (that retired, sniff sniff!).
Hope you like this version too. I'd love to hear what you think!
Until next time, stay crafty!
Steph
RECIPE:
Paper: Sahara Sand, Whisper White, Rich Razzleberry
Ink: Crisp Canteloupe, Sahara Sand, Silver Glimmer Paper (retired)
Stamps: Bitty Banners, Something for Baby
Tools: Big Shot, Perfect Polka Dots TIEF, Oval Framelits, Simply Scored, 7/8" Scallop Punch, Heart Punch (retired), Itty Bitty Punch Pack (retired)
Accessories: Hanger Clips (retired)
Showing posts with label Framelits: Ovals. Show all posts
6.02.2014
6.01.2014
Sweet Baby for Sunday Stamps Challenge #77
Welcome to another challenge at Sunday Stamps. Love the colour combo we've got going on this time - Bermuda Bay, Pacific Point & Sahara Sand.
I am in love with my creation! When I started designing this card, I was just trying to get rid of some retiring products before the new catty launch tomorrow (hanger clips & Silver Glimmer) and am really pleased with the CAS look I accomplished.
I absolutely love the Something for Baby set (doesn't hurt that I earned if for FREE!!) that's launching in the new catalogue tomorrow AND, there are coordinating Framelits for them too! I opted to cut the pieces by hand though because I didn't want a border around my images.
Anyway, hope you'll be inspired by the colour combo and play along with us! You've got until Friday, June 13th to upload your design. We can't wait to see what you come up with.
Until next time, stay crafty!
Steph
P.S. Come back tomorrow to see the girl version I created of this card...
RECIPE:
Paper: Sahara Sand, Whisper White
Ink: Bermuda Bay, Pacific Point, Sahara Sand, Silver Glimmer Paper (retiring)
Stamps: Bitty Banners, Something for Baby
Tools: Big Shot, Perfect Polka Dots TIEF, Oval Framelits, Simply Scored, 7/8" Scallop Punch, Heart Punch (retiring)
Accessories: Hanger Clips (retiring)
Challenge: Sunday Stamps
I am in love with my creation! When I started designing this card, I was just trying to get rid of some retiring products before the new catty launch tomorrow (hanger clips & Silver Glimmer) and am really pleased with the CAS look I accomplished.
I absolutely love the Something for Baby set (doesn't hurt that I earned if for FREE!!) that's launching in the new catalogue tomorrow AND, there are coordinating Framelits for them too! I opted to cut the pieces by hand though because I didn't want a border around my images.
Anyway, hope you'll be inspired by the colour combo and play along with us! You've got until Friday, June 13th to upload your design. We can't wait to see what you come up with.
Until next time, stay crafty!
Steph
P.S. Come back tomorrow to see the girl version I created of this card...
RECIPE:
Paper: Sahara Sand, Whisper White
Ink: Bermuda Bay, Pacific Point, Sahara Sand, Silver Glimmer Paper (retiring)
Stamps: Bitty Banners, Something for Baby
Tools: Big Shot, Perfect Polka Dots TIEF, Oval Framelits, Simply Scored, 7/8" Scallop Punch, Heart Punch (retiring)
Accessories: Hanger Clips (retiring)
Challenge: Sunday Stamps
9.14.2013
She Believed She Could...
I attended a Stampin' Up! workshop last weekend that was filled with business tools, techniques, projects & more. One of the projects was a canvas home decor piece. Check it out:
I hope I didn't offend by tweaking her design a bit. I don't know why, but I saw a plaid pattern when holding the stripe stencil in my hand (which is how Jamilla's banner was done). I'm thrilled with the way it came out! The plaid is really the major thing I changed. All the other elements are the same, I just moved them around a bit.
I surprised my daughter with this by hanging it in her room. She was so grateful and appreciative that I made this just for her. After seeing that, I was so happy that I gave project a chance!
Until next time, stay crafty!
Steph
I hope I didn't offend by tweaking her design a bit. I don't know why, but I saw a plaid pattern when holding the stripe stencil in my hand (which is how Jamilla's banner was done). I'm thrilled with the way it came out! The plaid is really the major thing I changed. All the other elements are the same, I just moved them around a bit.
I surprised my daughter with this by hanging it in her room. She was so grateful and appreciative that I made this just for her. After seeing that, I was so happy that I gave project a chance!
Until next time, stay crafty!
Steph
4.28.2013
Mum's The Word
Happy Sunday... and if you follow my Blog, you know what that means... it's sketch week at Sunday Stamps! Holly put together a great sketch for us this week. With SU! releasing their retiring list this past Wednesday, this sketch is perfect for showcasing retiring DSP. Check it out:
This sketch really was perfect for me because I needed to clear out some space for new products that are coming my way from the new catty (being released to customers May 31st!). It's a great sketch to use up some DSP, and I also used some card stock in retiring colours.
I decided on a Mother's Day card because Mother's Day is only a few weekends away now... but the sentiment can be easily swapped out for another. Especially when you use Teeny Tiny Wishes! I added lots of interest with the TIEF and the boho blossom flowers.
Hope you'll play along with us this week. We'd love to see what you create with the sketch!
Until next time, stay crafty!
Steph
![]() |
| Paper: River Rock, Riding Hood Red, Twitterpated DSP Ink: Basic Grey Stamps: Teeny Tiny Wishes Tools: Big Shot, Oval Framelits, Holiday Frame TIEF, Boho Blossoms Punch Accessories: Pearls |
I decided on a Mother's Day card because Mother's Day is only a few weekends away now... but the sentiment can be easily swapped out for another. Especially when you use Teeny Tiny Wishes! I added lots of interest with the TIEF and the boho blossom flowers.
Hope you'll play along with us this week. We'd love to see what you create with the sketch!
Until next time, stay crafty!
Steph
4.19.2013
Dress It Up!
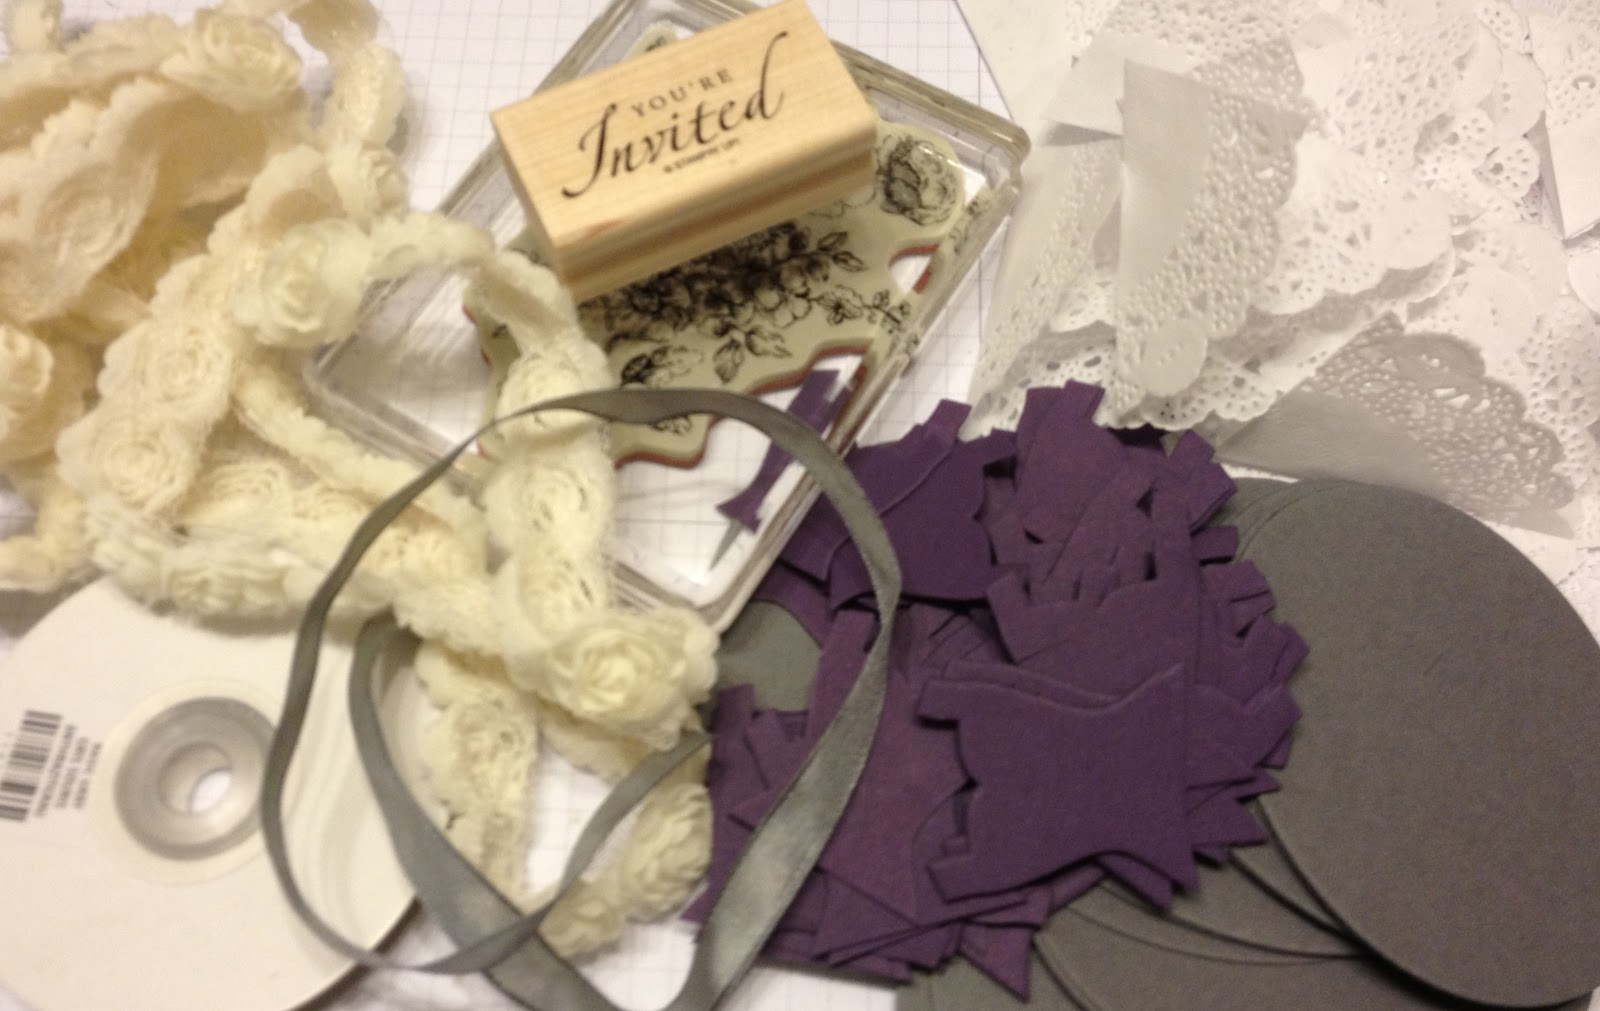
I've recently finished 50+ custom shower invitations and will share several steps of the design process with you over the next couple of posts. Here are the materials I used:
The bride's colours are purple and grey, so I incorporated them into the invitations. After a few designs, I settled on one that used a bleaching technique. Today's post will walk you through that. Bleaching works best with a darker piece of cardstock.
To bleach, I like to use a spare wood mount stamp case. These are perfect for all sorts of things. I fold some paper towel and pour some bleach on top. You don't want to add too much... just enough to get on the stamp.
Once you've "inked up" your stamp with the bleach, stamp the image on your cardstock:
And watch the magic happen before your eyes...
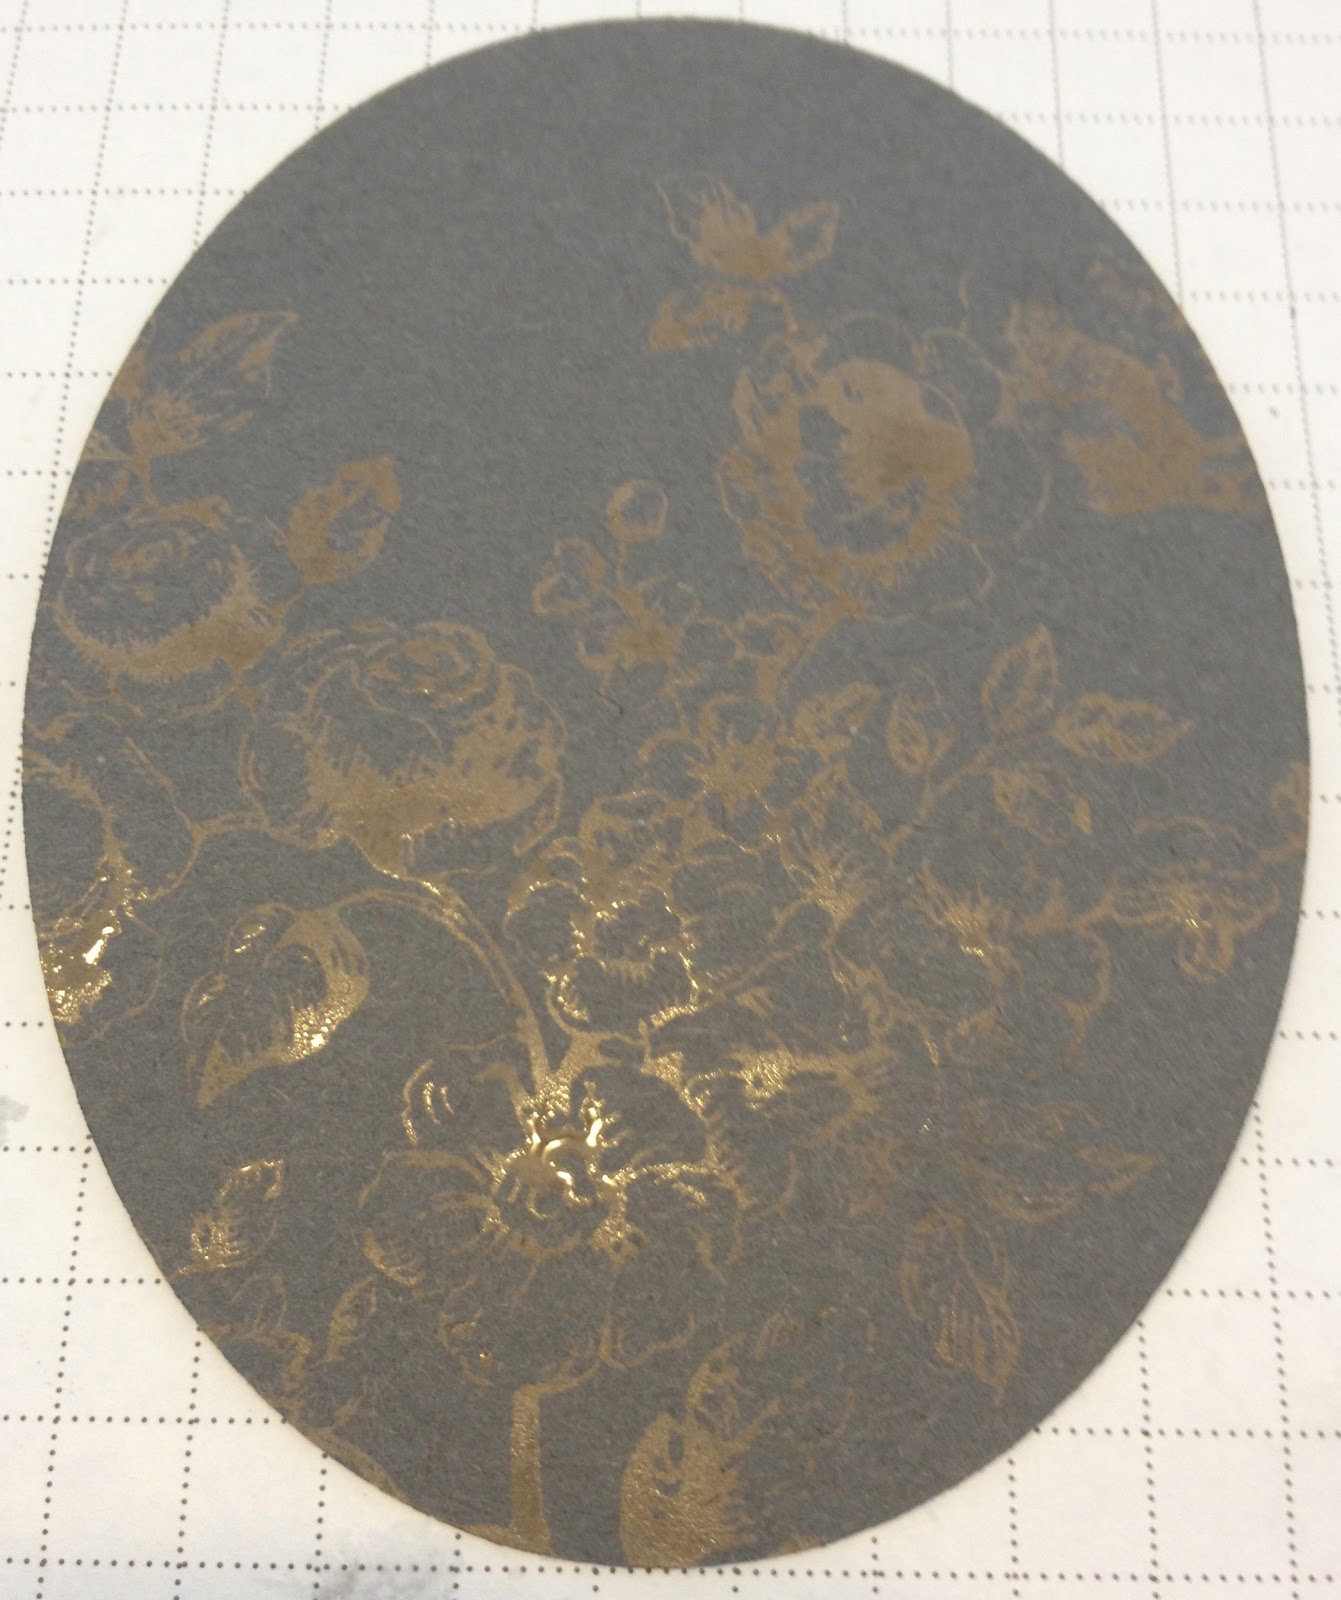
Here is the final result. It dries in under a minute, and I think is a really cool technique.
Once all of my ovals were stamped, I glued them to the base of my card. I used Naturals White Cardstock because I didn't want a stark white base.
Make sure you come back and visit me again tomorrow so that you can see the completed card and another step-by-step guide on the second part to my design... want a hint? It involves the Dress Framelits from the Spring Catalogue. :)
Until next time, stay crafty!
Steph
The bride's colours are purple and grey, so I incorporated them into the invitations. After a few designs, I settled on one that used a bleaching technique. Today's post will walk you through that. Bleaching works best with a darker piece of cardstock.
To bleach, I like to use a spare wood mount stamp case. These are perfect for all sorts of things. I fold some paper towel and pour some bleach on top. You don't want to add too much... just enough to get on the stamp.
Once you've "inked up" your stamp with the bleach, stamp the image on your cardstock:
And watch the magic happen before your eyes...
Here is the final result. It dries in under a minute, and I think is a really cool technique.
Once I completed my 50+ bleached ovals, it was time to add the sentiment. I used the retired stamp set Sincere Salutations and Elegant Eggplant.
Once all of my ovals were stamped, I glued them to the base of my card. I used Naturals White Cardstock because I didn't want a stark white base.
Make sure you come back and visit me again tomorrow so that you can see the completed card and another step-by-step guide on the second part to my design... want a hint? It involves the Dress Framelits from the Spring Catalogue. :)
Until next time, stay crafty!
Steph
3.03.2013
The Easter Bunny is Coming...
... and he stopped in at Sunday Stamps! This is the first Easter card I created this year. I can't believe Easter is just around the corner!
For the bunny, I whipped out my Watercolour Crayons (haven't used those in a while!) and forgot how easy they were to use. I added some subtle colour and then inked the edges for some pop!
Now check out what the rest of the Design Team has created for you and then play along with us this week! Can't wait to see what you come up with!
Until next time, stay crafty!
Steph
For the bunny, I whipped out my Watercolour Crayons (haven't used those in a while!) and forgot how easy they were to use. I added some subtle colour and then inked the edges for some pop!
Now check out what the rest of the Design Team has created for you and then play along with us this week! Can't wait to see what you come up with!
Until next time, stay crafty!
Steph
2.10.2013
It's a Tri-Colour Challenge at Sunday Stamps!
Happy Sunday! This week we've got a fun colour combo for you - Early Espresso, More Mustard & Marina Mist. Feel free to substitute similar colours if you don't have the Stampin' Up! ones. Here's my card:
I cut out an oval shape with the NEW Oval Framelits found in the Spring Catalogue and stamped my image from Serene Silhouettes with StazOn ink. I glued the oval on an angle on my card base. On the "scrap" piece, I used one of my Paper Piercing Templates (this one from the Spring Catty) and pierced around my oval. I then threaded Linen Thread through every other hole and finished off with a Naturals Designer Button at the top.
I distressed the edges of my watercolour paper a bit for an added effect and I love, love, LOVE how this card came out. Way better than what I had pictured in my mind.
Hope this card inspires you to play along with us. Please check out what the rest of the Design Team has created for you & play along this week over at Sunday Stamps!
Until next time, stay crafty!
Steph
I cut out an oval shape with the NEW Oval Framelits found in the Spring Catalogue and stamped my image from Serene Silhouettes with StazOn ink. I glued the oval on an angle on my card base. On the "scrap" piece, I used one of my Paper Piercing Templates (this one from the Spring Catty) and pierced around my oval. I then threaded Linen Thread through every other hole and finished off with a Naturals Designer Button at the top.
I distressed the edges of my watercolour paper a bit for an added effect and I love, love, LOVE how this card came out. Way better than what I had pictured in my mind.
Hope this card inspires you to play along with us. Please check out what the rest of the Design Team has created for you & play along this week over at Sunday Stamps!
Until next time, stay crafty!
Steph
2.01.2013
I'm Back!
I took a small hiatus from Blogging this week, but I'm back now! I wanted to share a project with you today using the new Swallowtail stamp that's in the Spring Catalogue. I created a set of note cards with coordinating envies. Check it out:
I started with some of our note cards and stamped the image using VersaMark and then heat embossed with clear embossing powder. Next, I brayered each card using the following colour combos: Summer Starfruit/Old Olive, Sahara Sand/Raspberry Ripple, Pool Party/Elegant Eggplant. Once all was dry, I used the Oval Framelits to shape my note cards and I just think the shape is so much fun. Since I wanted to use these as a gift set and for sale, I packaged them simply, but in a way that anyone would be happy to receive these! I just love this new bold image... don't you?!
Until next time, stay crafty!
Steph
Until next time, stay crafty!
Steph
Subscribe to:
Posts (Atom)