You may have seen the "card in a box" photos, videos and tutorials floating around lately. Aren't they so much fun?! I got to make my first one a couple of weeks ago at our monthly team meeting, thanks to my awesome upline Leena! A couple of days ago I wanted to make more, so I followed Frenchie's Video Tutorial for a refresher and I have not stopped making them since!
The basic idea is obviously not mine, but the designs are all my original work. This one was especially fun to make because of all the bling with various gold accents - heat embossing, glimmer paper, sequins & foil paper. I just love how the large heart acts like a mirror. :)
Until next time, stay crafty!
Steph
RECIPE:
Paper: Modern Medley DSP, Very Vanilla, Basic Gray
Ink: VersaMark
Stamps: Best of Brides & Babies
Tools: Heart to Heart Punch (retired), Large Heart Punch, Small Heart Punch, Big Shot, Chalk Talk Framelits
Accessories: Sequin Trim, Gold Foil Paper, Champagne Glimmer Paper
Showing posts with label Project: 3D. Show all posts
3.20.2014
10.09.2013
Birthday Cake
Today's post is later than I had hoped, but I hope it was worth the wait! ;)
I created this card a few weeks ago for a dear friends' birthday. It was perfect because this card requires hand-delivery and we were going out for tea, so she had this card displayed on the table the entire time for her birthday celebration. Isn't the cake tea light adorable?! I found it on Pinterest (of course!) and you can find the awesome tutorial here on Jill George's Blog.
I didn't follow it exactly. I didn't bother with the separate template for the "icing". I just found the middle on the back, punched a hole and then cut slits that were long enough so that my flame could slide through.
On the back of the card, I punched a hole with the labels punch pack so that the switch could be turned on and off. My friend love it and I think I'll be making a bunch of mini cakes now. :)
Until next time, stay crafty!
Steph
RECIPE
Paper: Regal Rose, Pretty in Pink, Whisper White, SAB DSP
Ink: Perfect Plum
Stamps: Simply Sketched
Tools: Punch Pack, 1-3/4" & 2-3/8" Scallop Circle Punches, Labels Punch Pack
Accessories: Jewels, Stitched Grosgrain Ribbon
I created this card a few weeks ago for a dear friends' birthday. It was perfect because this card requires hand-delivery and we were going out for tea, so she had this card displayed on the table the entire time for her birthday celebration. Isn't the cake tea light adorable?! I found it on Pinterest (of course!) and you can find the awesome tutorial here on Jill George's Blog.
I didn't follow it exactly. I didn't bother with the separate template for the "icing". I just found the middle on the back, punched a hole and then cut slits that were long enough so that my flame could slide through.
On the back of the card, I punched a hole with the labels punch pack so that the switch could be turned on and off. My friend love it and I think I'll be making a bunch of mini cakes now. :)
Until next time, stay crafty!
Steph
RECIPE
Paper: Regal Rose, Pretty in Pink, Whisper White, SAB DSP
Ink: Perfect Plum
Stamps: Simply Sketched
Tools: Punch Pack, 1-3/4" & 2-3/8" Scallop Circle Punches, Labels Punch Pack
Accessories: Jewels, Stitched Grosgrain Ribbon
6.04.2013
Thanks a Bunch
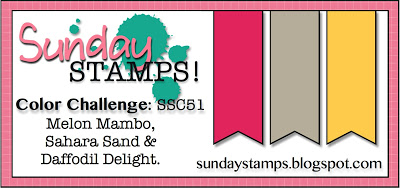
It's another week at Sunday Stamps... Kathya has got a fun colour combo for us - Sahara Sand, Melon Mambo & Daffodil Delight. I opted not to do a card this week, but a bunch of tags to thank a friend who brought me some homemade soup in a mason jar after my son was born. I'm not much of a baker or cook, but thought this was a nice gesture when I returned her jars.
Anyway, this was a quick and easy project to thank my friend for her awesome soup. She does like to bake & cook, so I know that she will get some use out of the tags I made for her.
I hope that you'll play along with this colour challenge! Pop on over to Sunday Stamps to play along... there are some exciting changes happening with the challenge. You now have two weeks to play along, and we're introducing some new DT Members. So head on over and see what's new while you upload your project!
Until next time, stay crafty!
Anyway, this was a quick and easy project to thank my friend for her awesome soup. She does like to bake & cook, so I know that she will get some use out of the tags I made for her.
I hope that you'll play along with this colour challenge! Pop on over to Sunday Stamps to play along... there are some exciting changes happening with the challenge. You now have two weeks to play along, and we're introducing some new DT Members. So head on over and see what's new while you upload your project!
Until next time, stay crafty!
Steph
5.11.2013
Wedding Card Box
One of my very good friends is getting married at the end of the month and as one of her bridesmaids (and the "crafty one"), she asked if I wanted to create a custom card box for her. Of course I jumped at the opportunity! Although I played around with a lot of ideas and it was harder to find boxes that would work than I thought, I am extremely pleased with how it turned out...
All the boxes are glued together with holes cut through them so that the cards can drop right to the bottom. I designed it so that the lid can pop off to empty out all the cards. Can you believe this cost me less than $15 to create?! Well, maybe you can believe it, but I think it looks far richer than that! I hope my friend loves it... and that you do too!
Until next time, stay crafty!
Steph
Until next time, stay crafty!
Steph
5.01.2013
Butterfly 3x3 Gift Set
Today I'm sharing a project I originally designed to use up retiring DSP... but I loved it so much I created an entire line to sell in my online store. Check it out:
Now, this DSP (Lovely Flowers) I've been hanging onto for a long while! It's so pretty, but it was finally time to let it go. :) It was just perfect for these butterfly cards...
I got the basic idea for the holder based on the "Tea Bag Pocket" tutorials I've seen online. I customized it to be able to fit my 3x3 cards & envelopes. The cards fit on one side and the envelopes on the other.
This is a sweet set to give to a host/hostess for all those summer BBQs you may be attending, for a thank you, teacher gift and of course, occasions such as Mother's Day (which is on May 12th).
Until next time, stay crafty!
Steph
P.S. If you live in or around Cambridge, we'll be making a version of this set on Sunday, May 5th in my "Fabulously Feminine" class. There are still a couple of spaces if you want to join the fun. The cost is only $10!
Now, this DSP (Lovely Flowers) I've been hanging onto for a long while! It's so pretty, but it was finally time to let it go. :) It was just perfect for these butterfly cards...
I got the basic idea for the holder based on the "Tea Bag Pocket" tutorials I've seen online. I customized it to be able to fit my 3x3 cards & envelopes. The cards fit on one side and the envelopes on the other.
This is a sweet set to give to a host/hostess for all those summer BBQs you may be attending, for a thank you, teacher gift and of course, occasions such as Mother's Day (which is on May 12th).
BUY NOW! You can purchase this here in my online store!
Until next time, stay crafty!
Steph
P.S. If you live in or around Cambridge, we'll be making a version of this set on Sunday, May 5th in my "Fabulously Feminine" class. There are still a couple of spaces if you want to join the fun. The cost is only $10!
10.27.2012
Star Ornament
I made a bunch of these last year and am in the process of making them again. They are so much fun and a "wow" when people take a look at them. There are different tutorials out there on how to make these, but I love Dawn Olchefske's tutorial here.
![]() |
| Ornament is kept closed with the button. |
![]() |
| Ornament opening up. |
![]() |
| Paper: Jolly Holiday DSP, Old Olive Accessories: 3/8" Very Vanilla Ribbon, Brights Button |
These ornaments are so simple to make and can be addictive too! I make them every year for gifts (they work great as a present decoration too!), my Christmas Tree (it's decorated with all handmade ornaments I've made over the years) and this year, I'll make them for my Craft Fair at the end of November.
I like to use a variety of patterned paper, but you can also use all of the same pattern too. Go watch the tutorial and give 'em a try!
Until next time, stay crafty!
Steph
4.29.2012
Reduce & Reuse!
I'm a big fan of recycling, and even better, to reduce & reuse waste. What better way to reduce & reuse than to create something crafty & pretty!
I've been collecting wine corks from various sources for years and together with fabric and a bamboo cutting board, I created a pretty and functional cork board. This would be perfect for the kitchen, or home office where wall space is limited.
What do you think?
Until next time, stay crafty!
Steph
I've been collecting wine corks from various sources for years and together with fabric and a bamboo cutting board, I created a pretty and functional cork board. This would be perfect for the kitchen, or home office where wall space is limited.
What do you think?
Until next time, stay crafty!
Steph
Subscribe to:
Posts (Atom)