Follow My Blog

Follow on Bloglovin
Showing posts with label Accessory: Ribbon. Show all posts

12.21.2012

Tree Shining Bright

Since we're so close to Christmas, I'll be posting the few last Christmas cards for 2012. Today's card has a lot of sparkle, thanks to the Glimmer Paper!

Paper: Pool Party, Very Vanilla, Champagne Glimmer Paper
Ink: Soft Suede
Stamps: More Merry Messages
Tools: Big Shot, Delicate Designs TIEF, Lacy Brocade TIEF, Holiday Framelits
Accessories: Cherry Cobbler Seam Binding Ribbon
With a little raised texture from the embossing folders, some colour from the Seam Binding Ribbon and lots of bling with the Glimmer Paper, this card came together quickly and has a CAS look to it that I just love. Also feeling the non-traditional colour scheme for Christmas.

What do you think?

Until next time, stay crafty!
Steph

12.08.2012

Thin Snowman in Disguise

I just recently (finally!) purchased the Snow Much Fun stamp set during the recent sale. I've loved it for a long time but it just always got pushed down on my wish list. This is the first card I've made with it:


Paper: Whisper White, Bashful Blue
Ink: Black
Stamps: Snow Much Fun
Tools: Big Shot, Northern Flurry TIEF, Circle Punches - 1", 1-1/4", 1-3/8"
Accessories: Real Red Grosgrain Ribbon (retired), Linen Thread, Dazzling Details
I don't know why my brain thought to disguise this thin snowman into a fat one, but it seemed cool in my head, so I created it! The card is 4-1/4" square. I scored it at 2-1/2" and 6-3/4". I stamped the snowman twice - once on Whisper White and a second time on Bashful Blue. I used my circle punches to punch him out and then used the punched Whisper White piece as a template to make sure I got my circles punched in the right spot on the front of my card.

I didn't want to have any other stamping on the card, so I ran my base through the Big Shot using the Northern Flurry TIEF for added texture. I paper-pieced my circles together on my Bashful Blue piece and then added my ribbon trim for some added colour. To finish things off, I used Dazzling Details on all his buttons.

What do you think?

Until next time, stay crafty!
Steph

11.15.2012

A Party Dress

Gotta love the tulle Stampin' Up! has in the current Holiday Catalogue. So many great uses for it. That's what I used to create a dress for this card:

Paper: Pretty in Pink, Early Espresso, Naturals Ivory
Ink: Early Espresso
Stamps: Established Elegance
Tools: Big Shot, Lacy Brocade TIEF, Corner Rounder
Accessories: Crumb Cake Tulle, Pearls, 1/8" VV Ribbon, Gold Glow Smooch Spritz
I'm in love with my creation. :) I can say that, right?! I used the dress form stamp as my base and then gathered the tulle over top of it and tied it together with a ribbon to form a "belt". To add more elegance to this card, I added some texture with the Lacy Brocade TIEF, Smooch Spritz and a pearl. I also added some sponging for a bit of a vintage feel.

I left a sentiment off this card because I think it could work for any number of special occasions - birthday or bridal shower, to name a couple.

What do you think?

Until next time, stay crafty!
Steph

10.17.2012

Snowman Kisses

I know it's been a long time since I posted a card, but I had to share yet another stocking stuffer I plan to make for my upcoming Christmas Craft Show. These Tic Tac containers are floating all over the Internet, but I've never seen one using this stamp set yet. Check it out:


I'm calling my Tic Tac Snowman "Snowman Kisses", but you can also find them called "Snowman Poop"... complete with a poem. I preferred kisses over poop. :)

I used the snowman from Stylin' Snowfolk. I love this new stamp set because you can build your own snowman or snowwoman. There are tons of accessories, including mustaches and eyeglasses! I chose to keep him simple for this purpose.

I had to alter the dimensions of templates I found online to fit my Tic Tac container (from Costco) and used my 3/4" Circle Punch for the Tic Tacs to peek through. To finish off, I thought this snowman needed a top hat... and gives the project a bit more dimension, I think.

Until next time, stay crafty!
Steph

10.16.2012

Easy Peasy Bookmarks

Like many other creations lately, this one too was inspired by Pinterest. Gosh, I love that site!


I would really like to use the Summer Starfruit ribbon too, but I haven't yet found a paperclip that matches close in colour. Maybe I just shouldn't match the ribbons to the clip and that would solve my problem! What do you think? Raspberry Ripple on a blue clip...

These are great for bookmarks or page dividers. All you need is a jumbo paperclip and about 4 inches of your favourite ribbon! Easy peasy.

This is one of the many ideas I've got going on for crafty items to make for my Craft Show in November... thinking to have lots of stocking stuffers for sale!

Until next time, stay crafty!
Steph

10.06.2012

Easy Peasy Thank Yous

Stampin' Up! Note Cards make it quick and easy to create beautiful note cards for any occasion. As part of the wedding samples I prepared for this weekend (see yesterday's post), I also created some thank you cards too. Take a look:

Paper: SU! Note Cards
Ink: Crumb Cake, Basic Gray, Daffodil Delight
Stamps: Everything Eleanor, Wacky Wishes (Hostess)
This card is purely stamping. No tools, no Big Shot (gasp!). I think it gives great impact, but with minimal effort. Change up the colours and sentiment and you can create these cards for any occasion. The label from Everything Eleanor is a perfect backdrop for larger sentiments.

Paper: SU! Note Cards
Ink: Daffodil Delight
Stamps: Teeny Tiny Wishes
Tools: Big Shot, Designer Frames TIEF, Elegant Lines TIEF,
Punches - Word Window, XL Oval
This card is more elegant than the previous, simple, and eye catching. The ever-popular and always a "wow" factor of the raised impressions from Textured Impressions Embossing Folders mean that you don't need much else.

Paper: SU! Note Cards
Ink: Basic Gray
Stamps: Perfect Punches
Tools: Big Shot, TIEF's: Fancy Fan, Manhattan Flower, Lacy Brocade,
Elegant Lines, Scallop Circle Punch
Accessories: Daffodil Delight Seam Binding Ribbon
Again, using the Textured Impressions Embossing Folders, you don't need much else! For this set of cards, I displayed four more elegant folders, used on the entire card base. I added a sentiment from Perfect Punches and accented with a pop of Seam Binding Ribbon.

Until next time, stay crafty!
Steph

9.30.2012

Simply Christmas

Today I have another simple card for you created from a Simply Scrappin' kit. These kits are great, and not just for scrapbooking!


Paper: Cherry Cobbler, Whisper White, Christmas Lane Simply Scrappin'
Ink: Old Olive
Stamps: Joyous Celebrations
Tools: Big Shot, Window Frames Framelits, Modern Label Punch
Accessories: Cherry Cobbler Seam Binding Ribbon, Dazzling Diamonds


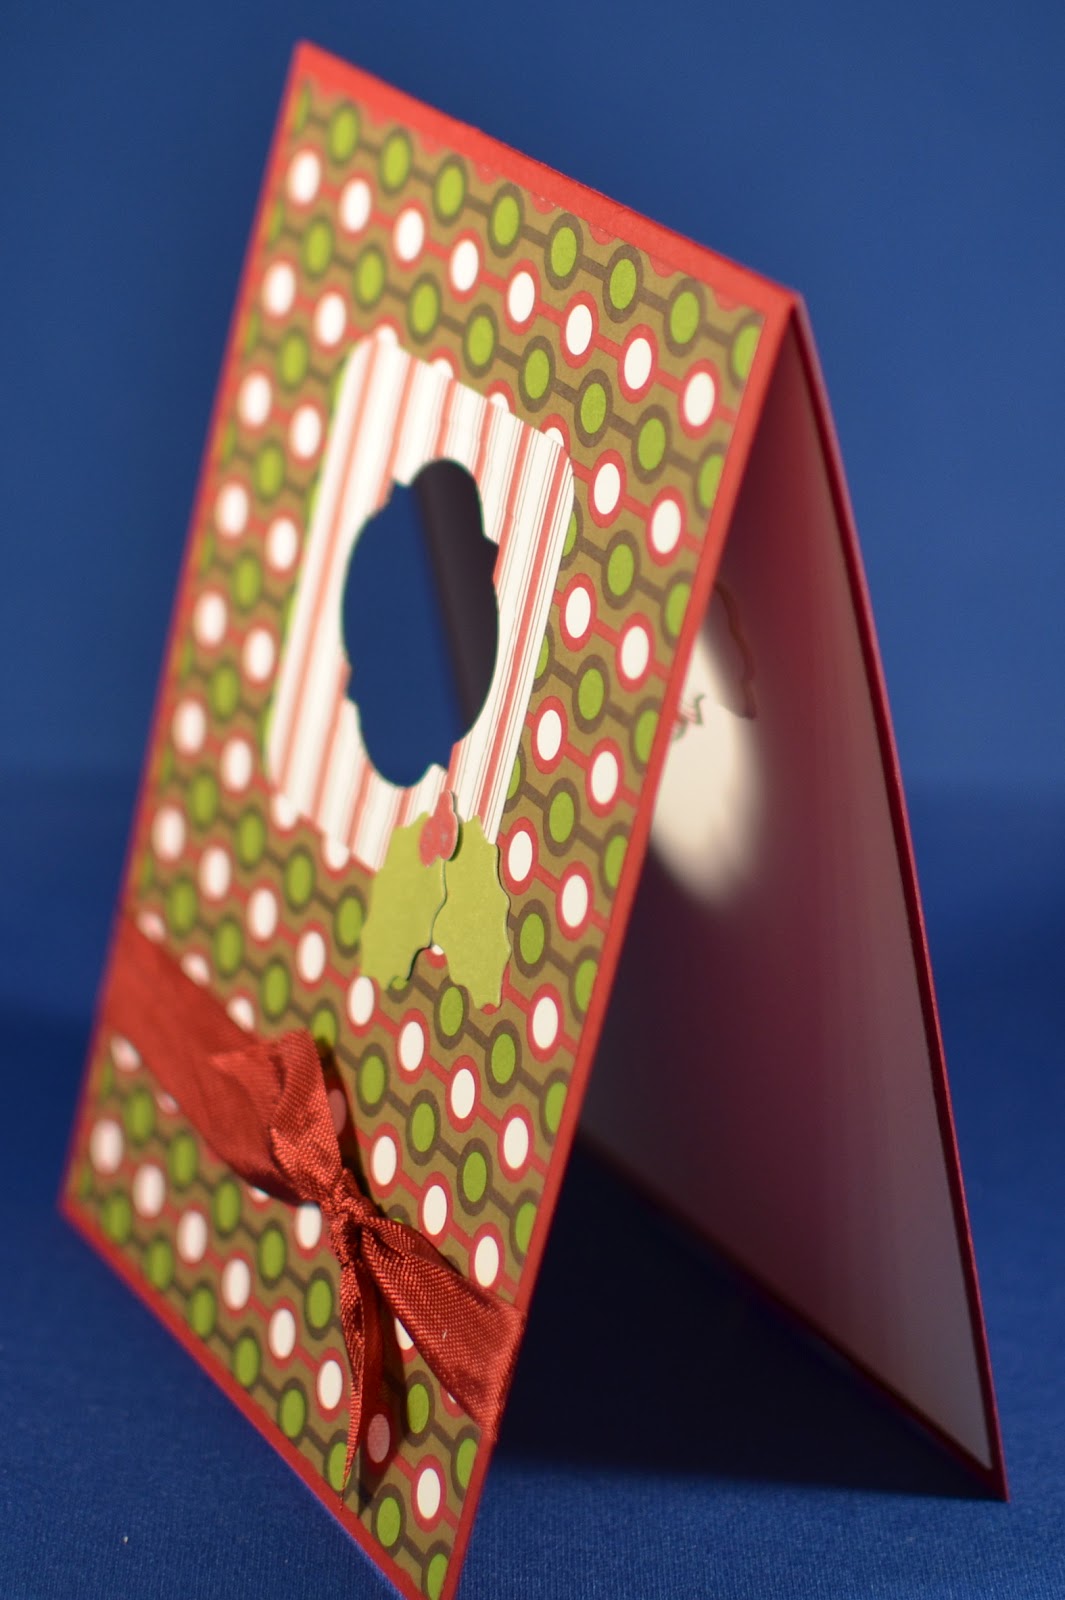
Thanks to the Simply Scrappin' kit, this card was quick and easy. Perfect if you have lots of Christmas cards to make! How cute is the "peek-a-boo" window?! So simple with Framelits since you can put them anywhere on your page!

Simply Scrappin' kits come with 12 x 12 card stock (coordinating colours to match the kit contents), self-adhesive accent sheets and DSP. The one I used is retired (Christmas Lane), but there are many wonderful new kits available in the Annual Catalogue, and one in the Holiday Catalogue - Merry Moments. I hope to be able to play around with that one soon!

Don't forget, today is the last day for the Back to Spool Promotion. Spend $50 (CAD) and get your choice of FREE 3/8 Satin Stitched Ribbon. Maybe pick up a few Simply Scrappin' Kits...

Until next time, stay crafty!
Steph

9.18.2012

Ornaments

Who doesn't love a stamp set with coordinating Framelits?! Well, one of my fav is the Ornament Keepsakes and Holiday Framelits. What makes it even better is that SU! offers a 15% discount when you purchase both together!


Paper: Basic Black, Whisper White, Real Red
Ink: Black, Real Red
Stamps: Comtempo Christmas (retired), Ornament Keepsakes
Tools: Big Shot, Holiday Framelits, Argyle TIEF
Accessories: Real Red Grosgrain Ribbon (retired)
Recently I received a replacement stamp from SU! because there was a misprint that happened during our pre-order period (yes, us Demos get to pre-order a month before a catty comes out!). Anyway, with the replacement stamp, I received not only the replacement label for it, but a sheet with four others as well (that didn't need to be replaced). So instead of throwing them out, why not us them on a card?! That's what the black ornament is - a stamp label. :)

To go along with my re-purposed labels, I die cut a coordinating ornament with the framelits in Whisper White. I popped up that entire layer and behind it, glued a piece of Real Red card stock that I embossed with the Argyle Textured Impressions Embossing Folder.

Inside, I reversed things a bit. I stamped the longer ornament in Real Red and used the die cutout (Whisper White) that I embossed also and popped it up. Sorry the pictures are so dark.

I was also able to create an identical card to this, but with the rounder ornament label and longer ornament die cut.

What do you think?

Until next time, stay crafty!
Steph

8.27.2012

Ribbon Storage!

I don't know about you, but I have TONS of ribbons. Before going strictly SU!, I probably had close to 100 spools of ribbon from various places. I have since sold off a lot of it, but still have my favourites, not to use on cards, but for gift wrapping. :)

Anyway, my point is that I still have a lot of ribbon and have tried several different storage solutions over the years. My preference is to work off the spool so that I know the exact amount of ribbon to use for a project. I also like to organize by colour and style.

I cannot take credit for this idea I'm about to share with you, but unfortunately also do not know who to give credit to for it!! 


These units are IKEA picture shelving. They come in two sizes, I opted for the longest size and currently have 3 shelves... although, I could use at least one more! :) These are also pretty easy to make, but I was impatient to wait for my handy husband, so I bought some. They're reasonably priced (I think around $20) and come in black or white.

They've worked with all different sized spools so far and have found them to be incredibly handy. I also added some IKEA jars that store flowers and such that I've scattered throughout my shelves. For my SU! ribbon shelf, I've used one to separate my retired and current ribbons.

Hope this idea has inspired you to organize something in your space too!

Until next time, stay crafty!
Steph

8.20.2012

Swapping

As promised, here are the swaps I created for the Hamilton Regionals on the weekend:

Paper: Pretty in Pink, Whisper White, Basic Gray, Bashful Blue
Ink: Pretty in Pink, Pink Pirouette, Basic Gray
Stamps: Love & Laughter
Tools: Big Shot, Polka Dots TIEF, Heat Tool, Clear Blocks, 1" Square Punch
, Boho Blossoms Punch
Accessories: Basic Gray Stitched Ribbon, Jewels, Pewter EP
Techniques: Clear Block Stamping, Heat Embossing

Paper: Cajun Craze, Very Vanilla, Comfort Cafe DSP
Ink: Pool Party, Summer Starfruit, Midnight Muse, Soft Suede
Stamps: French Foliage, Occasions Alphabet
Tools: Big Shot, Large Scallop Edgelit, Clear Blocks, Scalllop Circle Punch, Decorative Label Punch
Accessories: Very Vanilla Ribbon, Pearls
Techniques: Clear Block Stamping
For each of my Swaps, I used the Clear Block Stamping Technique. This is where you take your Clear Blocks (I used SU! Blocks C & D), ink 'em up as you would a stamp and then stamp them on your paper. It adds so much interest to a project and you get a "wow" factor without having to use extra tools or anything. The best part is that you get a different look every time you stamp again with them so no two projects will be exactly the same. The only trick is to make sure you don't move the block once it touches the paper or else you smear - same as stamps, but the blocks are more slippery. Hope I've inspired you to give it a try too!

Until next time, stay crafty!
Steph

8.07.2012

Colour Coach

The Colour Coach is a great tool and that's how I got my colour combo for today's card. I'll be honest with you that Pretty in Pink is not a colour I use often... but I have TONS of card stock in this colour, so I'm trying to use it more and more.

Since I don't use the colour often, I needed some colour inspiration, so I referred to the trusted Colour Coach and viola! Pretty in Pink, Certainly Celery and Marina Mist.

Paper: Pretty in Pink, Whisper White
Ink: Marina Mist, Certainly Celery
Stamps: Tea Shoppe
Tools: Big Shot, Framed Tulips TIEF, Modern Label Punch, Simply Scored
Accessories: Certainly Celery Grosgrain Ribbon (retired)
I started with a Pretty in Pink card stock base and embossed it with the Framed Tulips Textured Impressions Embossing Folder. I actually used the longest side of the folder and ran it through the big shot three times to get the border at the bottom of the card. The trick is to only run it through until you hit the folder and not all the way through. If you continue to run the card through the Big Shot with each additional border you add, you'd flatten your design. I love finding new ways to use SU! products! At the top of the Whisper White panel, I scored three lines using my Simply Scored, but it's hard to see that in the picture.

After stamping and cutting out the tea cup from Tea Shoppe, I added some Certainly Celery ribbon (retired) behind it for some added texture. The tea cup was then popped up with Dimensionals. I also randomly stamped the flower from the same set and then punched out my stamped sentiment with my Modern Label Punch.

What do you think?

Until next time, stay crafty!
Steph

7.26.2012

Still Time to Smile!

As you probably already know, July has been a reason to smile. For the entire month, you can purchase the exclusive Reason to Smile stamp set for only $5.00 when you purchase $60.00! What a sweet deal... especially since you can choose either clear-mount or wood-mount.

As a Demonstrator, we had the opportunity to pre-order this stamp set in June already. Of course I forgot to do that and so I only recently got it. Anyway, here is the first card I made with this beautiful set:

Paper: Whisper White
Ink: Poppy Parade, Daffodil Delight, Calypso Coral, Old Olive
Stamps: Reason to Smile, Tiny Tags
Tools: Big Shot, Framed Tulips TIEF, Little Labels Punch Pack
Accessories: Calypso Coral Organdy Ribbon
I started with a Whisper White card base and masked off about a 2 inch section. Next, I stamped the Gerber Daisies randomly in Poppy Parade and Daffodil Delight (two step stampin'). I then ran the card base through the Big Shot using the Framed Tulips TIEF, lining up the edge of the folder with my masked edge on the card base. To add even more dimension, I stamped another image from the same set on Whisper White and fussy-cut it out. I glued the stem to the card base and popped up the flower with Dimensionals. I added a tiny knotted piece to the stem with a glue dot and wrapped some Calypso Coral Organdy Ribbon around the top and added a tag.

What do you think?

Until next time, stay crafty!
Steph

7.15.2012

Patio Butterflies


I was honoured to be asked to be a Guest Designer for Sunday Stamps this week! I've enjoyed playing along for the last several challenges and look forward to many more. Here is this week's sketch and my design:

Paper: Primrose Petals, Summer Starfruit, Patio Party DSP
Stamps: Fabulous Florets
Ink: Midnight Muse, Summer Starfruit
Accessories: Jewels, Midnight Muse Satin Stitched Ribbon
Tools: Scallop Trim Border Punch, Big Shot, Beautiful Wings Embosslit


When I saw the butterflies in the sketch, I immediately thought of all those tiny butterflies in the Patio Party DSP. To add a little interest (and it's hard to tell in the photos), I stamped the large leaf image from the Fabulous Florets set in VersaMark, covered it in clear embossing powder and heated it. After all was dry, I got out my Brayer and brayered Midnight Muse ink all over the DSP. This allowed my leaf image to pop because the butterflies that were captured behind the clear embossing powder stayed lighter and you can still see the rest of the DSP, although darker, under the brayered ink. Cool, eh?!

I mounted the DSP on some Summer Starfruit card stock and punched a border in the same colour with my Scallop Trim border punch. I also added some Midnight Muse Stitched Satin Ribbon for more texture. I used my Beautiful Wings embosslit to get all the butterflies and scattered them across the front - I saved the largest one for inside the card. For the sentiment, I stamped one of the floral images in Summer Starfruit on Summer Starfruit card stock, added some Dazzling Diamonds to the center and stamped the sentiment from Petite Pairs in the center in Midnight Muse ink. Then I fussy-cut the flower out and popped it up with Dimensionals.

What do you think?

Until next time, stay crafty!
Steph

7.07.2012

Baby, Baby, Baby

I finally got a chance to ink up Baby Boutique. I just fell in love with that set in the new catty... but then again, what set didn't I fall in love with?! Anyway, an idea popped into my head as I was surfing the net and came across a colour challenge over at Hand Stamped Sentiments. Here are the details:


As soon as I saw the colour Calypso Coral as part of the challenge, I thought about using some of the Calypso Coral Organdy Ribbon that was part of the last SAB bundle. It's just the perfect size for little bows. And my idea was to create little bows on the booties in Baby Boutique. Here's my card:


These certainly aren't your typical baby colours, but this card could work for either boy or girl. Aren't the booties adorable?! I stamped those in Daffodil Delight. The card base and Seam Binding Ribbon are also Daffodil Delight. The embossed polka dot panels are in Baja Breeze, along with the punched out mat with the Modern Label punch. The sentiment is from Teeny Tiny Wishes and stamped in Calypso Coral. For texture and dimension, I added lots of ruffles and bows and a couple of pearls.

What do you think?

Until next time, stay crafty!
Steph

7.06.2012

A Colour & Sketch Challenge Duo

It is hot, hot, hot here in Cambridge today... a perfect excuse to stay inside and get all inky! :) Today I decided to combine two challenges in one card. There was a sketch challenge over at Mojo Monday and a colour challenge over at Stampin' Royalty. Here are the details:


When the stamp set Tea Shoppe came out in the last Occasions Mini, I just fell in love. I haven't had much opportunity however, to play much with it, so it's probably a good thing that I gravitated to it when I sat down to work on a card for these challenges. The colour combo of Basic Gray, Daffodil Delight and Baja Breeze are also such a calm trio and also thought it would be a great fit for the stamp set. Here's my card:


I used the Rock & Roll technique on the smaller tea cups. First, I inked up in Daffodil Delight and then rocked and rolled the inked up stamp over the Baja Breeze ink pad. It gives the image kind of a vintage/patina look to it. Cool, eh?!

To add some dimension and texture to the card, I cut some labels from the Labels Collection Framelits in Baja Breeze and Very Vanilla and embossed them with the Fancy Fan embossing folder. I also stamped the largest tea cup from the stamp set in Baja Breeze on Very Vanilla card stock and fussy-cut it out. I do love to fussy-cut, honestly! I think I may be one of very few out there that do enjoy it. ha. To finish, I added some Daffodil Delight Seam Binding Ribbon, layered a few pieces together and stamped some flowers on the inside in Basic Gray. Viola!

What do you think?

Until next time, stay crafty!
Steph

6.24.2012

I'm Back!

I know, I know... another long hiatus! I was consumed in 4 floors of "stuff" for the last week. We took part in a huge neighbourhood yard sale yesterday and I can't believe how much "stuff" I managed to pull out of my house! I was purging like crazy, packaging and pricing... every day! I had no time for anything fun. :( I shouldn't complain though, my hard work paid off... and I'm not ashamed to say that I crashed before 8 p.m. last night. ha.

Now on to why you came to my blog... the crafty stuff! Since I was on such a long hiatus, I needed some inspiration. What better way to get some inspiration than to find a challenge that interests me. Well, I found two! Mojo Monday and Sunday Stamps. Here are the sketches:


I decided to combine both challenges since Mojo Monday had a sketch challenge and Sunday Stamps had a Colour Challenge. Here is the card I created based on these two challenges:


What do you think? I love, love, LOVE the new Stippled Blossoms stamp set from SU!. It is such beautiful set and since I just got it last week (but didn't have time to play with it!), I had to use it when I found the opportunity to stamp today. I also used one of the new embossing folders from the Delicate Designs Textured Impressions set. I added some Daffodil Delight Seam Binding Ribbon and some hat pins that were in the last Occasions Mini.

I'm really happy with the way this card turned out. Just so cheery!

Until next time, stay crafty!
Steph

6.14.2012

The Last Humming Bird

This is the first time playing with Pals Paper Arts. The challenge this week (PPA136) was a colour challenge. In order to participate, you had to use Real Red, Night of Navy and Whisper White in your design.


Here's what I came up with:


It's hard to tell in the photo, but I interlocked two frames that I cut out with the Labels Collection Framelits and then cut out the inner pieces the same way so that everything would fit nicely together. Cool, eh?! Before gluing everything down, I stamped the floral image from Elements of Style and if you've been following my blog, you'll notice I used that humming bird again (!) from the same stamp set. I promise, that's the last of my humming bird cards for a while. :)

I embossed the card front with the NEW fan embossing folder from SU! and then created a flower with folded ribbon. The Real Red Grosgrain ribbon that I used is retired now, but it's the only ribbon I had in that colour. I threw in some hat pins (also retired), glued on my humming bird and viola!

What do you think?

Until next time, stay crafty! 
Steph

6.12.2012

Swaps

On the weekend, I attended a Demonstrator Event. It was a ton of fun. Part of that event (as I'm told happens with all SU! events), is that there was an optional swap. It was my first one and although it was daunting at first, I can tell you that I'll be participating in them again! So much fun and you get so many great ideas from the cards you receive.

The hard part for me was finding items to use that I had enough of... but after participating in this swap, I found out it's not necessary to have them all the same. Good to know for the future!

So on to my swap card. I really didn't do much stamping with this one, but instead created a fun "locking" card. I used mostly cardstock and fabric.

What do you think?


I just love the Labels Framelits collection. So versatile and easy to use. The Big Shot was definitely my friend on this card. At the last minute, I decided I wanted to also do a little stamping... so I used some stamps from the Papaya Collage and Memorable Moments stamp sets. The latter actually has a nice outline stamp that coordinates with the Labels Framelits. How perfect! I also hand-drew some faux stitching on the front label to mimic the inside stamp... did you catch that? :)

Until next time, stay crafty!
Steph

4.26.2012

In Memory...

Today is the 2-year anniversary of a loved one's death. I made this card especially for him. He was an AWESOME woodworker and truly was one-of-a-kind. This card not only features stamps that are appropriate to him, but also a technique called emboss-resist and uses some product that will be retiring at the end of this catalogue term (May 31st). So if the retiring products are a "MUST HAVE" on your list, make sure you order before the end of May!

What do you think?

Until next time, stay crafty!
Steph


Supplies
Stamps:
- Have a Seat, #120447 (clear), #116696 (wood) - retiring May 31st
- Tool Shed, #123688
- One of A Kind (retired)

Paper:
- Very Vanilla 81/2 x 11 Card Stock, #101650

Ink:
- Soft Suede Classic Stampin' Pad, #115657
- Daffodil Delight Classic Stampin' Pad, #119667

Accessories:
- Heart to Heart Punch, #119881  retiring punch, available until May 31st or until supplies last!
- Scallop Oval Punch, #119856
- Decorative Label Punch, #120907 - My go-to punch!
- Daffodil Delight Seam-Binding Ribbon, available as part of Summer Smooches Promo (ends April 30th!), and is a sneak-peek from the NEW catalogue.
- Brayer, #102395
- Clear Embossing Powder, #109130
- Heat Tool, #100005
- Big Shot, #113439
- Top Note Die, #113463