Follow My Blog

Follow on Bloglovin
Showing posts with label shaker card. Show all posts

3.20.2017

A Sketch Challenge - HSS #259

Happy Monday!

Hope you had a fabulous weekend. I thought I'd start my week off with a sketch challenge over at Hand Stamped Sentiments. It was just what I needed to finish designing the last card for my class next week.


With Sale-A-Bration coming to a close on March 31st, I wanted to incorporate some of the awesome Inside the Lines DSP that you can earn for FREE with a $60 order. Just because it's colouring paper though, doesn't mean you always have to colour it.


I used the dies from the Detailed Dragonfly Thinlits and cut from Kraft Cardstock. I created a panel (actually, it's a card I cut apart from a past card kit... but you could easily create one yourself) and turned it into a shaker card! I love how the beads and sequins are highlighted against the black and white paper.


Before putting my shaker card together, I embossed the card layer with an embossing folder that I thought was carried over from the Holiday Catalogue, but just discovered it was not! Oops! A great alternative thought would be the current Petal Burst embossing folder.

Until next time, stay crafty!
Steph

For more information on Stampin' Up!, my class offerings or to purchase products, please visit my site at www.hofkissed.stampinup.net

Here is the sketch I used and the challenge where I entered this card for consideration:

3.19.2017

Alternative Projects for Paper Pumpkin March 2017

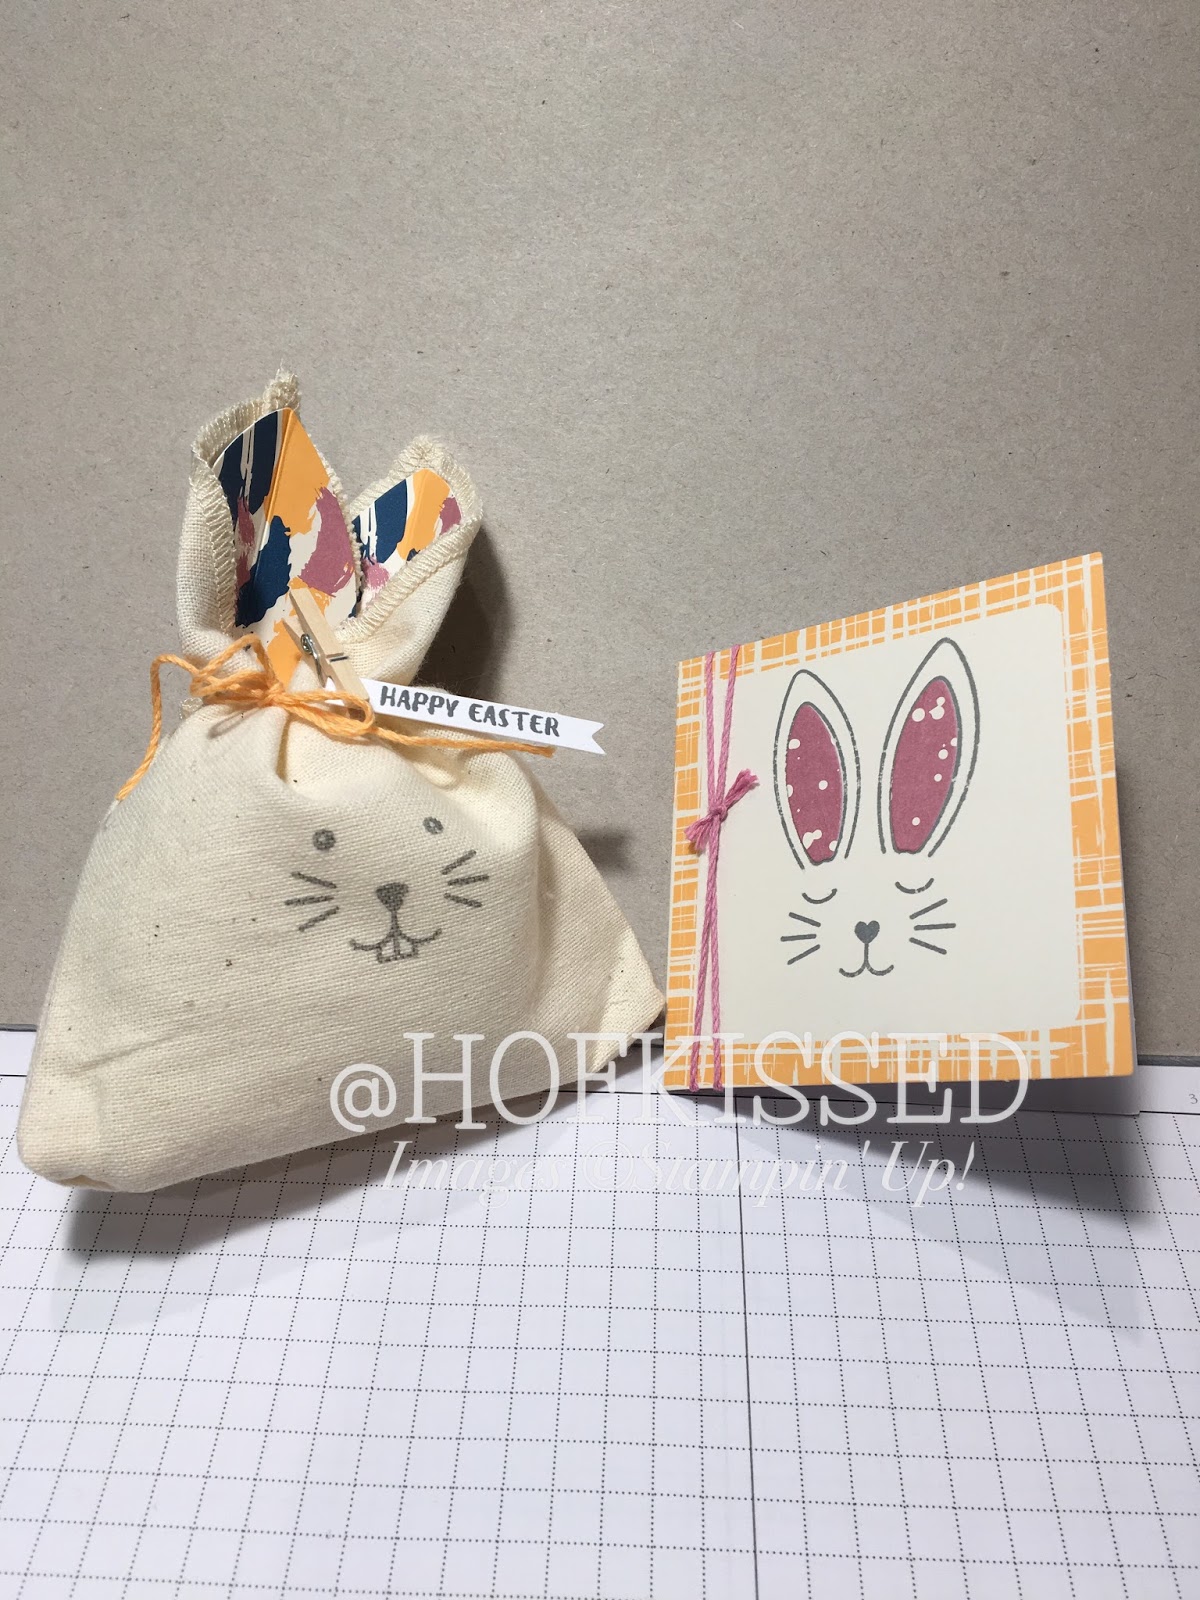
You know I love Paper Pumpkin... just as much as I love altering the kits every month to create something different then what was intended. ;) Yesterday, I posted a video to my YouTube Channel that walks you through the kit and then the projects I posted below. I promised in the video that I would post some still shots of the projects, so here they are!

Here's what the kit makes - so adorable, right?! I really loved all the different faces you could stamp and how nicely you could stamp on the fabric bags.


By having some Note Cards and Envelopes on hand and the willingness to cut your kit apart a bit, you could create the following two cards...


I really enjoyed playing around with the stamp images in this kit! By doing some repeat stamping with the "eyes", "whiskers" and "mouth/nose" you can create some great backgrounds or patterns. Cool, eh?!  For the card on the right, I used one of the "ears" to create petals. I coloured them in with Watercolour Pencils and blended the colours together with a Blender Pen.


I explain more about the next two in the video, but I used the tissue paper that comes in every kit and applied it to the card front. It adds lots of interest and colour. I also created a shaker card - those are so fun!


Lastly, I turned those easter eggs into dinosaur eggs... and combined them with the No Bones About It stamp set. :)


Hope you loved these alternative projects! Don't forget, a 3-month Paper Pumpkin subscription is on sale until March 31st, and purchasing one before the end of the month qualifies you for a FREE Sale-A-Bration product. It's a win-win! In addition, Sara Douglass (CEO of Stampin' Up!) has created April's kit and included a free gift to everyone inside each kit!! Can't wait to see what it is... don't forget to subscribe by April 10th if you want in on her kit.

Here's the video:


Until next time, stay crafty!
Steph

To purchase Stampin' Up!, or for more info, please visit my site at www.hofkissed.stampinup.net

10.04.2016

Sprinkles? Yes Please!

Today I'm sharing a card I designed for my Shaker Card Class on Thursday night. To create my shaker, I used real sprinkles - it's so yummy, I could eat it!  The stamp set Sweet Cupcake looks so real already, so it was a no brainer for me to use real sprinkles.


I kept the card fairly simple to allow focus on the cupcake. I used the Confetti embossing folder to frame my shaker component and some retired 3/8" Pool Party Glitter Ribbon. If you love that look, you can get the Pool Party ribbon dirt cheap on the Clearance Rack right now, or purchase the Blushing Bride & Silver combo pack from the Holiday Catalogue.


The sentiment on the front is from the Sprinkles of Life stamp set - isn't it just perfect for this card?! On the inside I used images and a sentiment from the cupcake set.

Until next time, stay crafty!
Steph

If you'd like to purchase Stampin' Up! products or would like a catalogue, please visit my online store at www.hofkissed.stampinup.net

9.30.2015

Shaker Card Magic!

Are you one to think making shaker cards is hard or you need a bunch of special things to make them? Well, you're wrong! I learned at an event I attended in the summer that you actually don't need much at all... and I'm here to share the secret with you!

All you need are the edges from your Dimensionals (pop dots) and some Window Sheets. Want to reuse/recycle and save some more money?? Use the extra acetate sheet Stampin' Up! gives you when you buy Photopolymer stamps. ;)


Start by cutting slits along the side of your Dimensional edges. Make sure not to cut all the way through. This will help to make them easy to bend around your window.


After you've punched or die cut your opening, glue the window sheet down and then start sticking your cut Dimensional border around. It doesn't have to be perfectly around your shape, but you want to make sure your shaker pieces can't escape.


Before you affix it to your card base, lay your confetti pieces down and put a few more Dimensionals on the card layer so everything is raised, not just the area around your cut out.


Sometimes the confetti pieces get stuck, so just give your card a few good shakes and all should be good, but just like that, your card is done! Isn't it easy?!


Give it a try with various punches or Framelits/Dies and see all the fun things you can come up with.

Until next time, stay crafty!
Steph