Follow My Blog

Follow on Bloglovin

1.31.2018

Paper Pumpkin Alternatives!

I'm excited to share more details with you today on some of my #redboxchallenge cards I created using past Paper Pumpkin Kits. Some pieces dating as far back as 2014! Gasp!!


You may have seen my above teaser on Instagram earlier today. As promised, I will go into more details on some of them... be prepared for a longer-than-normal post. ;)


Above is a quick & simple home decor piece I created with a 5x7" frame. I used the gold letter stickers you got in the June 2016 kit, Banner Surprise. It's not my greatest video (one of my firsts, actually and it's OK to laugh!), but check it out for a tip on getting those letters. ;)


See, a good laugh, right? So many errors... hehe.

Here come a few alternatives that use pieces from as far back as July 2014!! You'll see from the samples below how I combined many of the same pieces to create different designs.


This first one uses some star paper (it really was the "garbage pieces" from the shaker card components!) from the December 2014 kit, All Shook Up. I combined it with a few other elements from the current catalogue - doilies, Stampin' Blends and some paper.


Here's another example... do you see those stars again?! The blue star was a sticker from the July 2014 kit, Wish Big. I combined it again with the Stampin' Blends and the Color Me Happy Stamp Set. The "you" was die-cut with the Celebrate You Thinlits Dies... yours FREE with any $120 order.


Here are the stars again... but totally different card, eh?! On this card though, I used the "garbage piece" from the star stickers and created a background with it. I also combined those same elements, but also used the Epic Celebrations Stamp Set (free with any $60 order) and Shimmer Ribbon (also free with a $60 order). 


One last one with those stars... I know, I had a lot! This time though, I combined those 3-year-old kit pieces with a the recent kit from August 2017, Giftable Greetings. I added some Silver Thread and heat embossing.


These two (actually, I was able to create three), used pieces from the August 2017 kit, Giftable Greetings. I used the "garbage pieces" from the punched out flowers... maybe you see a trend here. haha. The stamp set is from the July 2017 kit, Positively Picturesque.

This last one is one of my favourites! I used the flowers and stamp from the August 2017 kit, Giftable Greetings, the leaves (flipped over to reveal the white side) are from the September 2017 kit, Layered Leaves and the detailed circle is from the October 2017 kit, Pining for Plaid. You'd think they were all from one kit!


As you can see, when you subscribe for a minimum of 3-months, you get a whole bunch of items that can work together to create new projects! Until March 31st is actually the best time to subscribe. When you purchase a 3, 6 or 12 month subscription, you can earn Sale-A-Bration freebies (up to 5!!), save money (on the 6 or 12 month subscriptions) AND, even earn Hostess Dollars when you purchase the 12-month subscription. How cool is that?! If you're considering the 12-month for $295, I highly suggest adding an additional $5 item so that your total gets up to $300, earning you 5 Sale-A-Bration freebies AND $30 in Hostess Dollars!

Hope I've inspired you if you have some of these kits lying around... and if you're not a subscriber, perhaps you're intrigued enough to give it a shot!

Until next time, stay crafty!
Steph

Product List
Heat Tool
[129053]
$40.00
Big Shot
[143263]
$136.00


1.15.2018

First Blog Hop of 2018!


Welcome to another month of our Blog Hop - it's been a while! This month we're sharing new goodies with you form the Occasions Catalogue and Sale-A-Bration Brochure. There are definitely some drool-worthy products!

I decided to focus on some Sale-A-Bration freebies today and they can be yours too with a minimum order of $60. I used the Heartfelt Blooms set. It's a new type of stamp from Stampin' Up! called Distinktive. This type of stamp lays down ink at different opacities to give the image real depth. It doesn't look like much until you ink it up, but it's amazing! Check it out:


Another freebie I used were the Tutti Fruitti Cards & Envelopes... except I cut them up. hehe. I used the patterned cards as layers on my solid card fronts (in coordinating colours of course) and stamped the bloom image on each. I kept the card relatively simple. I love how they came out!


I stamped the bloom again in each colour on Whisper White and cut out with the Stitched Shape Framelits. Hard to tell from the photo but I also used some Wink of Stella to add some shimmer. For a little more bling, I coloured some Rhinestones with Blends (used the closest tone to match) so that the cards had a more two-colour look.


Here's one last look at the full card... in one of my favourite colours. I just love Lemon Lime Twist!


Thanks for hopping by (hehe) and make sure you check out the other designers from our Tri-City team:


1. A La Cards (Leena)
2. Lolly & Sand (Sandy)
3. justBstamping (Barb)
4. Stamping with Jen (Jen)
5. Hofkissed (Steph) << You Are Here

Until next time, stay crafty!
Steph

If you would like to purchase Stampin' Up! or take a class, visit www.hofkissed.stampinup.net or check me out on Facebook at www.facebook.com/hofkissed

Product List

12.15.2017

A Week in Review

Hello!

This is the first post of many weekly installments I'm entitling "A Week in Review".  These posts will showcase a variety of projects, many of which I have teased with on Instagram, but here, you'll get more detail. ;)

Cards:

This first one features some current & new products that are coming up in the new Occasions Catalogue (live January 3rd). I used the Ronald McDonald Stamp Set - Sharing Sweet Thoughts - in conjunction with the Everyday Jars Framelits and some new products, including some yummy DSP and a tiny strawberry punch! I kept the card fairly simply, but created a small shaker element. I stamped some strawberries & coloured them with Stampin' Blends and used some punched strawberries as the shaker pieces.


This next card features many new products, including a sequin embossing folder!! Eek!! Speaking of sequins, there are some self-adhesive sequins in the new catty too! The other elements, some scalloped velvet trim and silver vellum embellishments, are part of an embellishment pack. It's pretty fabulous. To make some of those vellum pieces really pop, I burnished the vellum to make certain areas white and this technique also naturally curls the vellum, making it look more dimensional.


This last card is one I designed for my class tonight. I love the Half Full Stamp Set. To give the wine glass extra depth, I coloured them in with my Stampin' Blends, followed by my Fine Tip Glue Pen - did you know it hardens and turns glossy, as well as glue? I love using it to accent pieces of a project!


Scrapbooking:

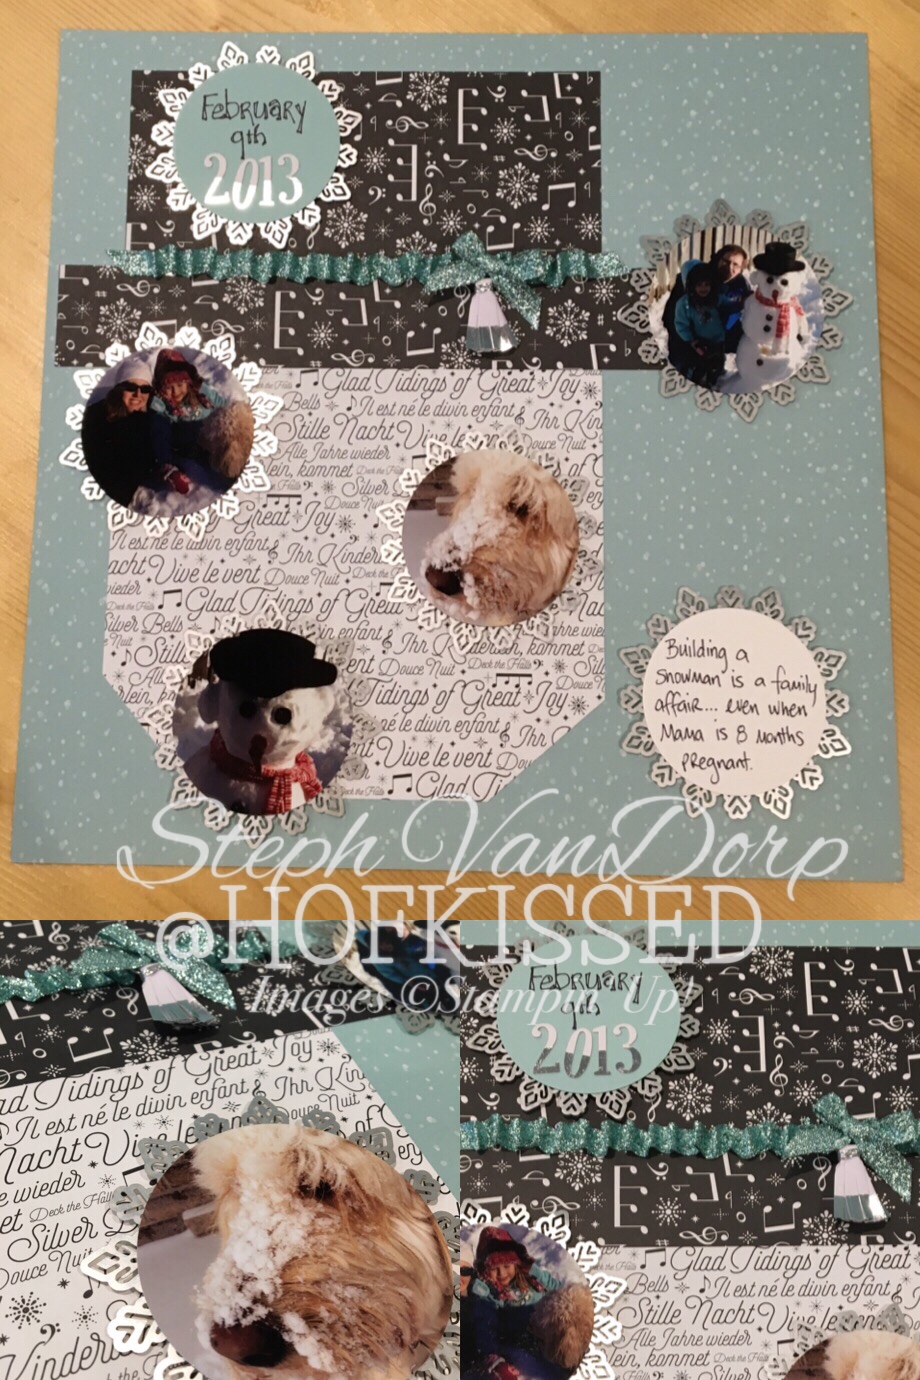
One of my goals for the new year is to keep up with my memory keeping. I've got years of catching up to do! Here's a simple layout I created. I was inspired by a quilting pattern for the snowman. I cut my pictures with Layering Circles Thinlits and laid some silver Foil Snowflakes in behind. I also snuck a few new embellishments (from that same embellishment pack I chatted about above).


3D Projects:

Obviously I love handmade, but when it comes to holiday decor, I love adding a new piece or two every year to my decorating. Here's a table centerpiece I created. I repurposed the base from a floral arrangement I had received and added some floral foam & cotton balls. The tree "trunks" were from a past Paper Pumpkin kit and the "trees" were originally going to be from a past kit as well (October 2014). That kit included pie-shaped boxes, but they weren't in colours I wanted for this project. While I could've covered them in DSP, I opted to trace the boxes and create new ones instead. I hammered three different sized holes on all sides and from the inside, covered a few randomly with Glimmer Paper in all the metallics and the remainder with Vellum. The pieces then have interest with or without light.


My last project is with the little Pizza Boxes - how cute are they?! They're perfect for a some homemade baked goods or small treats. I created a removable band for them, as well as some Santa cinnamon sticks. My mom used to make them when I was younger, so I thought I'd give it a try. I painted the ends and then added the beard and pom pom with Embossing Paste. I think they make the perfect topper to my boxes.


Hope you enjoyed this first installment of many. See you next week for my Week in Review. ;)

Until then, stay crafty!
Steph

If you would like to purchase Stampin' Up! or take a class, visit www.hofkissed.stampinup.net or check me out on Facebook at www.facebook.com/hofkissed

9.15.2017

September's Paper Pumpkin


Welcome to another month of our Blog Hop! This month we're sharing fall-themed projects with you. My Paper Pumpkin arrived yesterday and what perfect timing that was! I decided to put it together, and if you're itching for more, be sure to pop in again tomorrow because I'll have a whole heap of alternative projects!


You got so much product in this kit! There were enough pieces to create eight pillow boxes & eight mini cards with envelopes PLUS tons of extra pieces. Stampin' Up! is always really great at giving you extra pieces. ;)


In the kit, you got a large maple leaf stamp (my fav!) and then you layered that with multiple other leaves, including a gold foil laser-cut one.


What made this kit extra special was that the boxes and card bases were embossed! That was something that has never been done before with Paper Pumpkin Kits and it made me so happy to see that extra touch.

Paper Pumpkin kits are the perfect addition to your home - great for all crafting levels. It arrives right to your door every month and is an all-inclusive kit - stamps, ink, adhesives (glue dots &/or Dimensionals), kit pieces & instructions. If you're thinking about giving it a try, make sure you sign up by October 10th. :)

Make sure you check out the other hoppers:

1. Hofkissed (Steph) << You Are Here
2. A La Cards (Leena)
3. Lolly & Sand (Sandy)
4. justBstamping (Barb)

Until next time, stay crafty!
Steph

If you would like to purchase Stampin' Up! or take a class, visit www.hofkissed.stampinup.net or check me out on Facebook at www.facebook.com/hofkissed